Search
Close this search box.

Managing changes in approval

Adjustment of approval at company level

  1. Section Settings Company Approval.
  2. Select the approval method, levels, and select an approver from the list of application users.
    Change of approval on the company
  3. Confirm with the Save settings button.
    If you want to set up consistent approvals for all users, teams, and projects at the company level, proceed as follows:
  4. Click Override all individual settings.
  5. Confirm with the Override all settings button.

Modifying team-level approvals

  1. Settings Teams – select the team you want to edit.
  2. Approval tab.

  1. Edit levels and approvers and Save settings.
    If a team member has individual user-level approvals set up, you need to override all of these settings to team-level approvals. After saving the settings, continue:
  2. Click the Override all individual settings box and confirm with the Override settings button.

Modification of project level approval

  1. Section Settings Projects – select the project you want to edit.
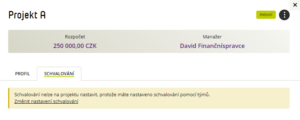
  2. Approvers tab.

  1. Edit levels and approvers and Save settings.

Approval Management FAQs

Setting approvers at the company level is used if you do not have an approver set on the project and/or if you have set “approvals are governed by company level settings” on the project.

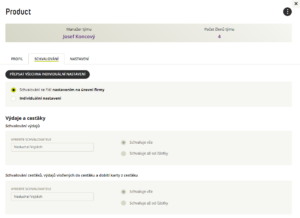
Follow the instructions below to set up individual user approval.

  1. In Settings → People , click on the user for whom you want to set up approval.
  2. After selecting a user, the user detail with the Approvals tab appears on the right side of the screen.
  3. In this tab, you select the Individual Settings option and override it according to your requirements.
  4. Since the settings of the cards are based on the settings on the users, this change is immediately written into the personal card settings of the users.

Project management and changes

Modification of the project

  1. Section Settings Projects – select the project you want to edit.
  2. Click on
    Settings icon
    and select Edit Project.
    Modification of the project
  3. Edit the necessary data and Save the project.

Project activation/deactivation

  1. Section Settings Projects – select the project you want to edit.
  2. Click on
    Settings icon
    and type Activate/deactivate project.

Deleting a project

  1. Settings Projects – click on the project you want to delete.
  2. Click on
    Settings icon
    and select Delete Project.

Vehicle management

Vehicle activation/deactivation

  1. Section Settings Vehicles – click on the vehicle you want to activate/deactivate.
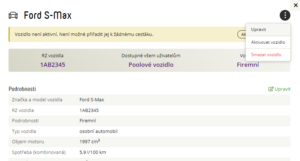
    The vehicle is active:
  2. Click on  and select Deactivate vehicle.
    The vehicle is deactivated:
  3. Click on and select Activate vehicle.

Vehicle modification

  1. SettingsVehicles – click on the vehicle you want to edit.
  2. Click on the green Edit sign (right side of the screen).
  3. Edit the required data and Save.

Deleting a vehicle

  1. Section Settings – Vehicles.
  2. Click on the vehicle you want to delete and via select Delete vehicle.
  3. Confirm with the button Delete.

Export of vehicles

  1. Section Settings – Vehicles .
  2. Set the filter and click on
  3. ChooseFormat and click on Export.

Management and changes to assignments

Changes to meal allowance rates

The meal plan cannot be changed, only a new one can be created with the earliest date of validity from the day after its creation. This setting is valid until it is replaced by a new setting.

  1. Section Settings Credits- Meals Create new (top right).
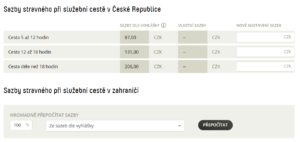
  2. Write the name and select the validity, add the new domestic meal allowance rates.
    You can adjust the foreign meal allowance:
    a. Bulk – enter the percentage of the meal allowance and select Recalculate.
    b. Individually – in the search box, type the country for which you want to adjust the meal allowance. Also change the rate for the selected country.
    Meal allowance rates
  3. Save.

Changes to pocket money rates

  1. Section Settings Honours Pocket Money.
  2. Choose to calculate your pocket money before or after the reduction of foreign diets.
  3. Enter the percentage of your pocket money and select Recalculate.
  4. Save.

Managing and changing teams

Adding members to the team

  1. Settings Teams – select the team you want to edit.
  2. Click on Settings icon and select Add Team Members.
  3. Check the users you want to add and select Add Selected.

Adding users to your team

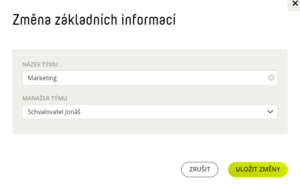
Change manager or team name

  1. Settings Teams – select the team you want to edit.
  2. Click on Settings icon and select Edit.
  3. Edit the name or select another manager from the list of users and Save Changes.

Change team settings

Deleting a team

  1. Settings Teams – select the team you want to delete.
  2. Click on Settings icon and select Delete Team.
  3. Confirm with the Delete team button.

Managing and changing cards

Card renewal

  1. Tasks section – click the Renewal Card Acceptance Confirmation task and Open.
  2. Check both confirmation boxes and Confirm.

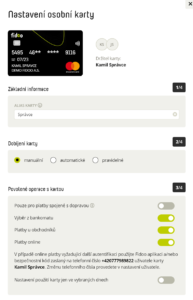
To change the card settings

  1. Settings Tabs – click on the tab you want to edit.
  2. Click on :trojrypák: and select Show settings.
    Card settings
  3. Edit the tab settings and Save.

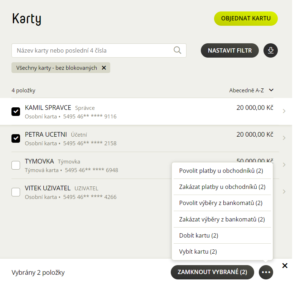
Change merchant payment and ATM withdrawal settings for multiple cards

  1. Section Settings Tabs – tick the tabs you want to change.
  2. Click on :trojrypák: (bottom centre) and select Allow/Disallow merchant payments or ATM withdrawals and confirm with OK.
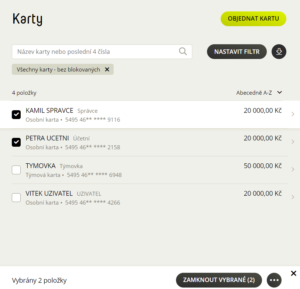
Bulk change card settings

Bulk change of payment settings at merchants and ATM withdrawals

  1. Settings Tabs.
  2. Click on :trojrypák:select Allow/disallow merchant payments or ATM withdrawals and confirm with OK.

Lock/unlock one card

  1. Settings Tabs – click on the tab you want to lock.
  2. Click on Lock/Unlock Card (top right), or tick the Discharge Card at the same time checkbox and confirm with the Lock/Unlock button.
Locking the Fidoo card

Lock/unlock multiple cards

  1. Settings Tabs – tick the tabs you want to lock.
  2. Click Lock/Unlock Selected (bottom centre), or tick the Discharge Cards at the same time box.
  3. Confirm with the Lock/Unlock Selected button.

Lock multiple cards

Bulk lock/unlock cards

  1. Settings Tabs.
  2. Click on Lock all cards, if unlocked click on :trojrypák: and select Unlock all cards.
  3. Confirm with the Lock/Unlock all cards button.

Handing over the team card by the administrator

  1. Settings Tabs – click on the tab you want to hand over.
  2. Click on  :trojrypák: and select Change holder.
  3. Select the new holder from the list of users and select Continue.

Permanent blocking of the card

  1. Settings Tabs – click on the tab you want to block.
  2. Click on :trojrypák: and select Permanently block.
  3. Confirm with the Block Card button.

Charging/discharging the card

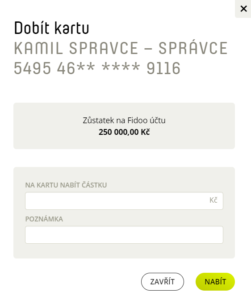
  1. Settings Cards – click on the card you want to load/unload.
  2. Click on :trojrypák:and select Charge/Discharge.
  3. Fill in the amount, in case of a discharge you can tick Discharge all and confirm with the Charge/Discharge button.

Charging the Fidoo card

Charging/discharging multiple cards

  1. Settings Cards – tick the cards you want to charge/uncharge.
  2. Click on :trojrypák: (bottom centre) and select Charge/Discharge.
  3. Fill in the amount, in case of discharge you can tick Lock the cards at the same time and confirm with the Charge/Discharge button.

Bulk charge/discharge cards

  1. Settings Tabs.
  2. Click on  :trojrypák: and select Charge/Discharge.
  3. Fill in the amount, in case of discharge you can tick Lock the cards at the same time and confirm with the Charge/Discharge button.

Change of card approver

Personal card

The settings of the approvers of the personal card correspond to the settings of the cardholder’s approvers.

Team card

  1. Settings Tabs – select the tab you want to edit.
  2. Approval tab – select Individual settings.
  3. Select one or two level approval, select the approver from the list of application users and Confirm settings.

Frequently asked questions about card management

In the case of a personal card, a change is only possible if the holder’s name changes. In this case, however, there is no need to order a new card, you only need to update your personal data in the Fidoo app. This can only be done by the AML Attorney who enters the new identification into the Fidoo application according to the newly issued ID. The next card issued (e.g. after expiry) will already be issued in the new surname.

Changing the name on an already issued card is therefore not possible.

If it’s issued as a personal card, it won’t. However, employees at Fidoo can transfer team cards freely as long as they are authenticated by an AML Authorised Person.

Changes to settings

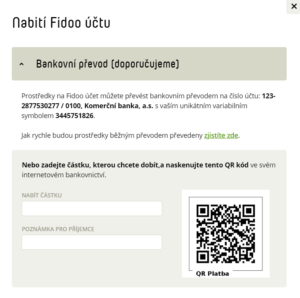
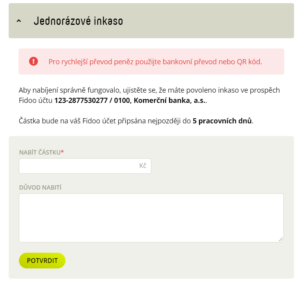
  1. Section Settings CompanyFidoo account.

Click Change settings to make the following changes:

  • collections,
  • notification of the balance on your Fidoo account,
  • generation of automatic Fidoo account statements.
Fidoo account settings

Fidoo billing and fees

Fidoo account balance

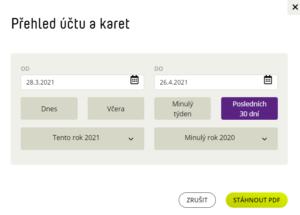
  1. Corporate Finance Fidoo Account section – click on Fidoo Account and Card Overview.
  2. Enter the date and click on Download PDF.

Export from Fidoo account

Setting up invoice sending

  1. Section
    Settings – Company – Billing
  2. Click

    to activate/deactivate sending invoices by e-mail
  3. Select who will receive the invoice by email by ticking the key role, selecting a user or entering an address and
    Save your changes
    .

Invoices can be found in the Corporate FinanceInvoices and Fees section, where you can download the invoice for the month in PDF format.

Fee statements in the Corporate FinanceInvoices and Fees section, where you can download the statement for the month in PDF format.

The invoiced amount is automatically debited from the Fidoo account at the beginning of the month following the month of invoicing. If your Fidoo account is not sufficient, you will be asked to top up your account by email.

If you have set up the generation of statements (link), you can find them in the Corporate FinanceFidoo Account section under the Statements tab.