Search
Close this search box.

Fidoo card renewal

When to renew the card

The standard validity of each payment card is three years. This way, you can always find the month and year to which it applies on your credit card. You will not be able to pay with the card after this date. To avoid a situation where your card is no longer valid and you do not have a new – renewed card available, we automatically start the process of card renewal in advance, i.e. issuing a new card with the same number and a new three-year validity period.

Who can renew the card

  • Two months before the card expires, we inform both the Fidoo’s main administrator and the cardholder that the card is about to expire.
  • From this point on, the chief administrator has a few weeks to decide whether or not to renew your card.

How to confirm receipt of a renewed card

Web app

  1. Tasks section – Renewal card acceptance confirmationOpen.
  2. Check the Receipt Confirmation box and type Confirm.

Mobile app

  1. Bottom menu More – Tasks – click on the Renewal card acceptance confirmation task .
  2. Select Accept Card, the card becomes active.

Frequently asked questions about the web or mobile application

By confirming receipt of the card and activating it, the original card will no longer function and only the renewed card with a new validity period will be valid. So always make sure you already have a new card before confirming receipt of your card.

The original card will expire at the end of its validity and the renewed card will remain inactive until you activate the card by confirming its acceptance.
Money on the card

Finding your card balance

Web app

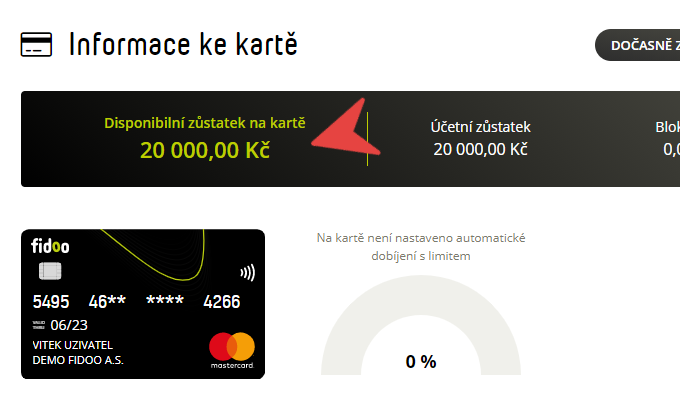
  1. My Finance – Cards – If you have multiple cards, go to Card Information and select the card whose balance you want to see.
  2. In on the right side of the screen you can see the available balance on the card and the amount blocked.
    Balance on the card

Mobile app

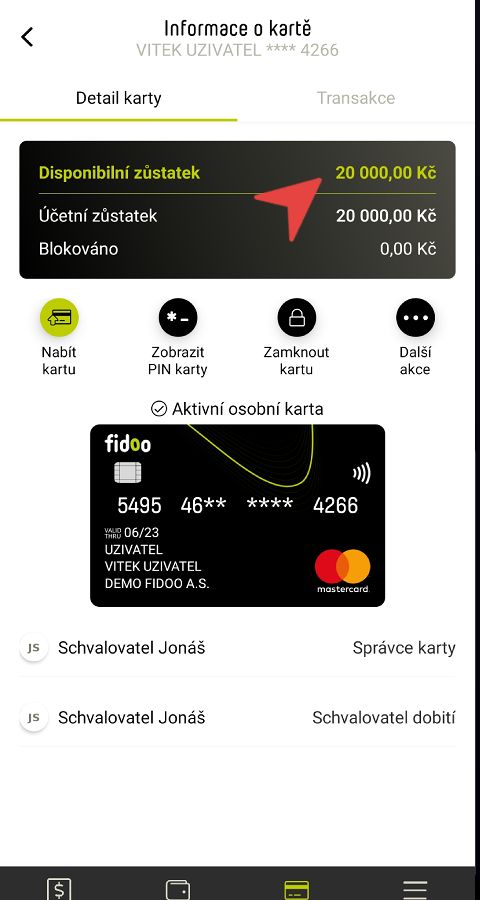
  1. Bottom menu – Cards – click on the card whose balance you want to see.
  2. In card details you can see the available balance on the card and the amount blocked.
    Mobile card balance

Request for top-up

Web app

  1. My Finance – Cards – If you have more than one card, go to Card Information and select the card you want to top up.
  2. Click on Top up card (top right).
  3. Enter the amount and select Top Up.

Mobile app

Play Video
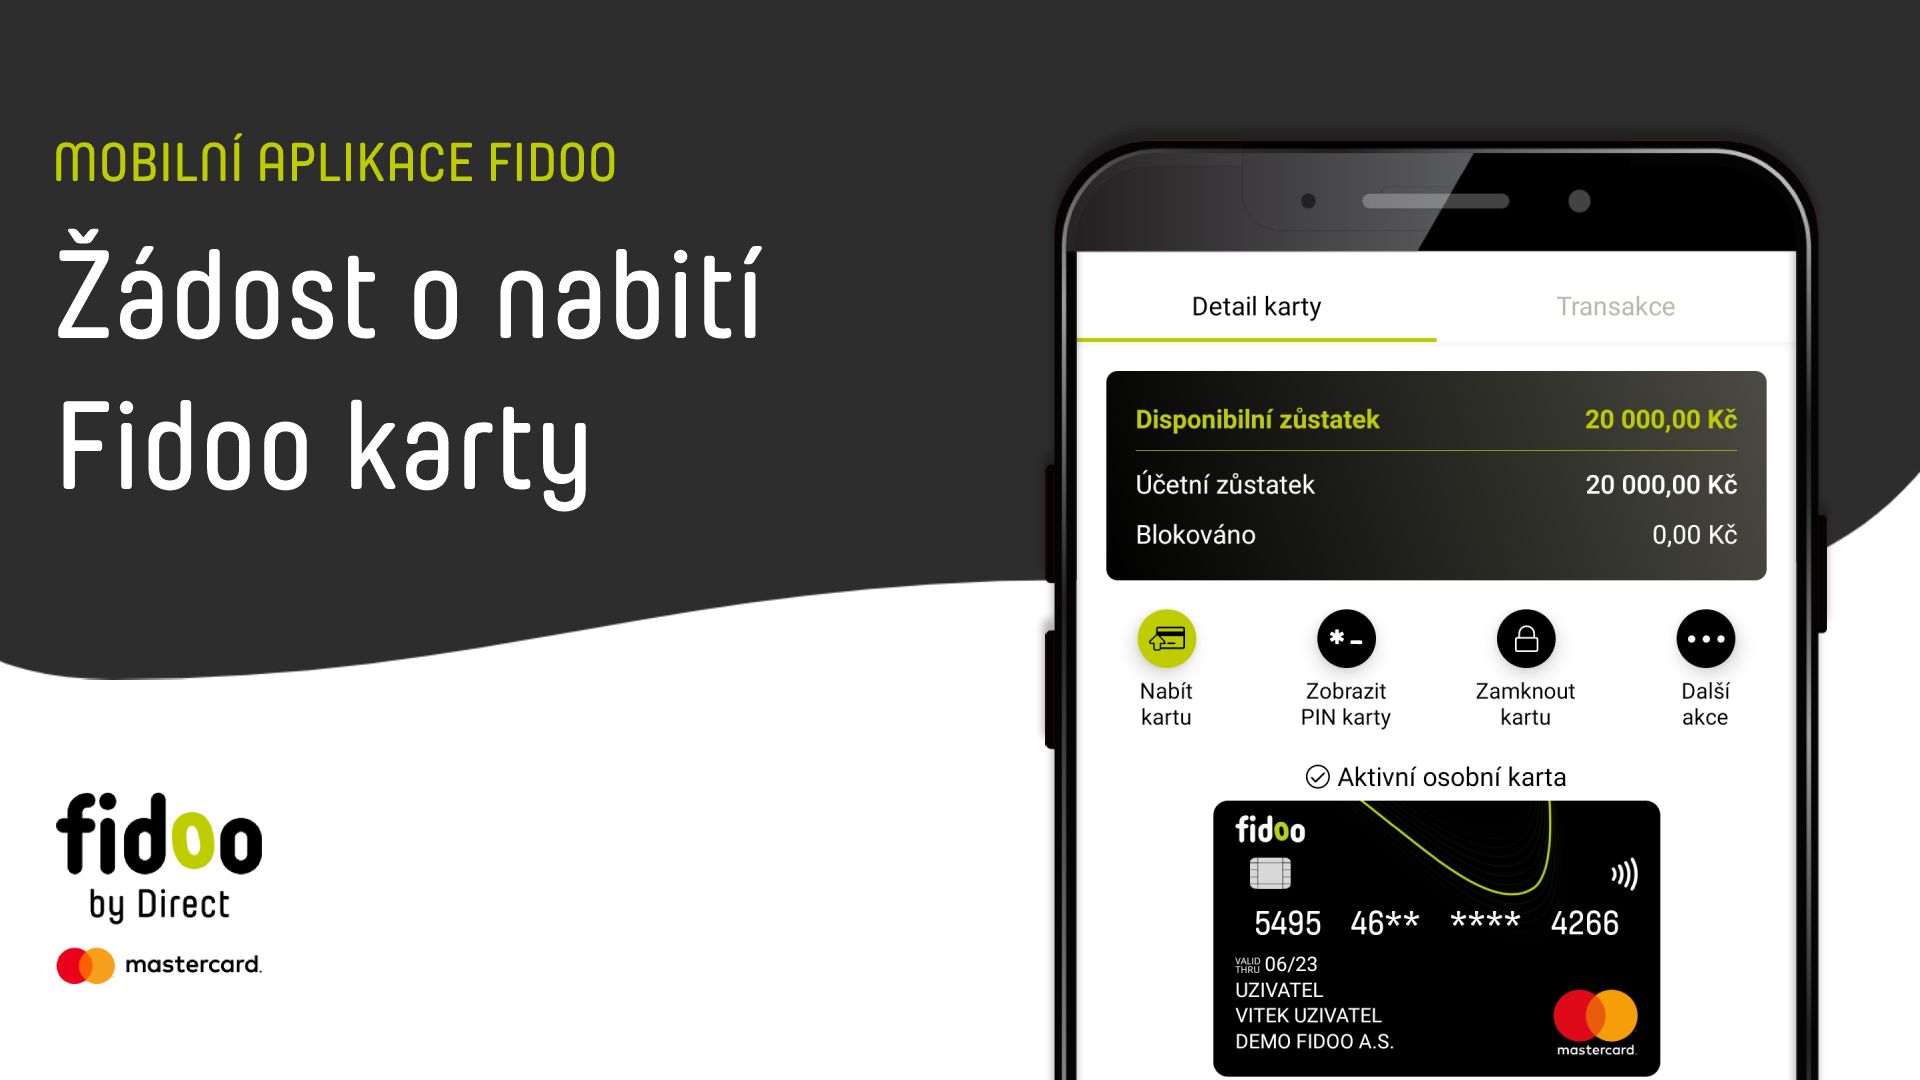
  1. Bottom menu – Cards – click on the card you want to top up.
  2. Select Charge Card and enter the amount.
  3. Confirm by clicking on the pipe (top right).

Frequently asked questions about the money on your card

Payment by card

Paying at the merchant's terminal

  • When paying up to CZK 500, just attach the card to the terminal.
  • For payments of more than CZK 500, hold your card to the terminal and enter your PIN.

Paying on the internet

Web app

  1. After selecting the payment method, you will be redirected to the payment gateway.
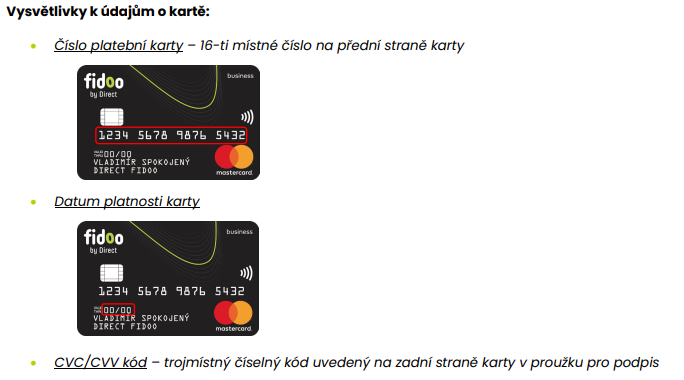
  2. Enter the full card number, expiry date, CVV/CVC code and confirm.


    Fidoo card

  3. Log in to Fidoo, where a payment confirmation window will appear.
  4. Click on Approve Payment.
  5. Enter the password to log in to the app and the SMS code that will be sent to your phone and Confirm.
  6. Close the payment confirmation window and return to the merchant’s website.


    External card
    The third step is to confirm the payment on your bank’s website according to their instructions.

Mobile app

  1. After selecting a payment method, you will be redirected to the payment gateway.
  2. Enter the full card number, expiry date, CVV/CVC code and confirm.
  3. Click on the notification you received on your phone.
  4. Click on Approve Payment.
  5. Confirm with a fingerprint, facial scan or PIN to log in to the app.
  6. Close the payment confirmation window and return to the merchant’s website.

ATM withdrawal

  1. Insert your card into the ATM and enter your PIN.
  2. Select Cash Withdrawal, enter or select the amount, confirm and proceed as instructed at the ATM.

MO/TO payments

What are MO/TO payments and what are they used for?

MO-TO payments is the term for transactions that take place “remotely” (i.e. over the phone or email).
They are used, for example. when booking a hotel, renting a car or ordering goods or services over the phone.
In practice, the payment is made by the cardholder providing sensitive card details to the other person without further
security (card number, expiry date and CVC/CVV code) and this payment can then be successfully
implemented.

Currently, MO/TO transactions are already minimally used, as they have been replaced by payment gateways. If
the cardholder encounters this type of transaction, we recommend caution and verification
the trader to whom the data is transmitted.


MO/TO transactions and Fidoo cards

Fidoo cards also support MO/TO transactions while maintaining an appropriate level of security. Already at the moment
activation of the Fidoo card, this payment method is automatically enabled.
However, the way in which the MO/TO enters the payment is often crucial to the success of the payment
processing directly by the merchant where the cardholder makes the payment. To eliminate potential problems
we recommend using payment terminals or payment gateways.

Frequently asked questions about paying by card

This is the three numbers listed on the back of the card by the signature strip. It is a code that is used to identify the card when paying online.

Confirmation via push notification is only available in the current version of the Fidoo mobile app for both iOS and Android. We recommend downloading the latest version.

The second reason may be that the merchant (the e-shop) does not require this method of verification.

With the Fidoo card, you can only top up Google Ads by topping up a specific amount in one go, as follows:

  1. In Google Ads, click on Settings & BillingBillingOverview at the top right.
  2. Click on the Make Payment button.
  3. In the window that opens, click Add Credit or Debit Card.
  4. Enter your Fidoo card details and the amount you want to top up.

    After checking your details and confirming, the top-up amount is immediately loaded into your Google account and the transaction is immediately displayed in the Fidoo app.

If you pay by card frequently or for smaller amounts, the merchant’s terminal may not connect to the bank to verify the current balance and charge the payment later. Why is this happening? Every online payment costs something, so some merchants accept small amounts. offline. It also helps them check in faster at the checkout. Thus, the card is not blocked, as is usual, and the merchant simply deducts the payment from the card in a few days, which can put the card in the negative.

It’s good to know that you won’t see the payment in the app if it’s offline. You will only see the payment when the merchant posts it.

Fidoo card PIN

PIN display

Web app

  1. My FinanceCards – If you have more than one card, go to Card Information and select the card you want to know the PIN for.
  2. Click Show PIN.
  3. Enter the SMS code you received from your phone and the password to log in to the app and click Confirm Password.

Mobile app

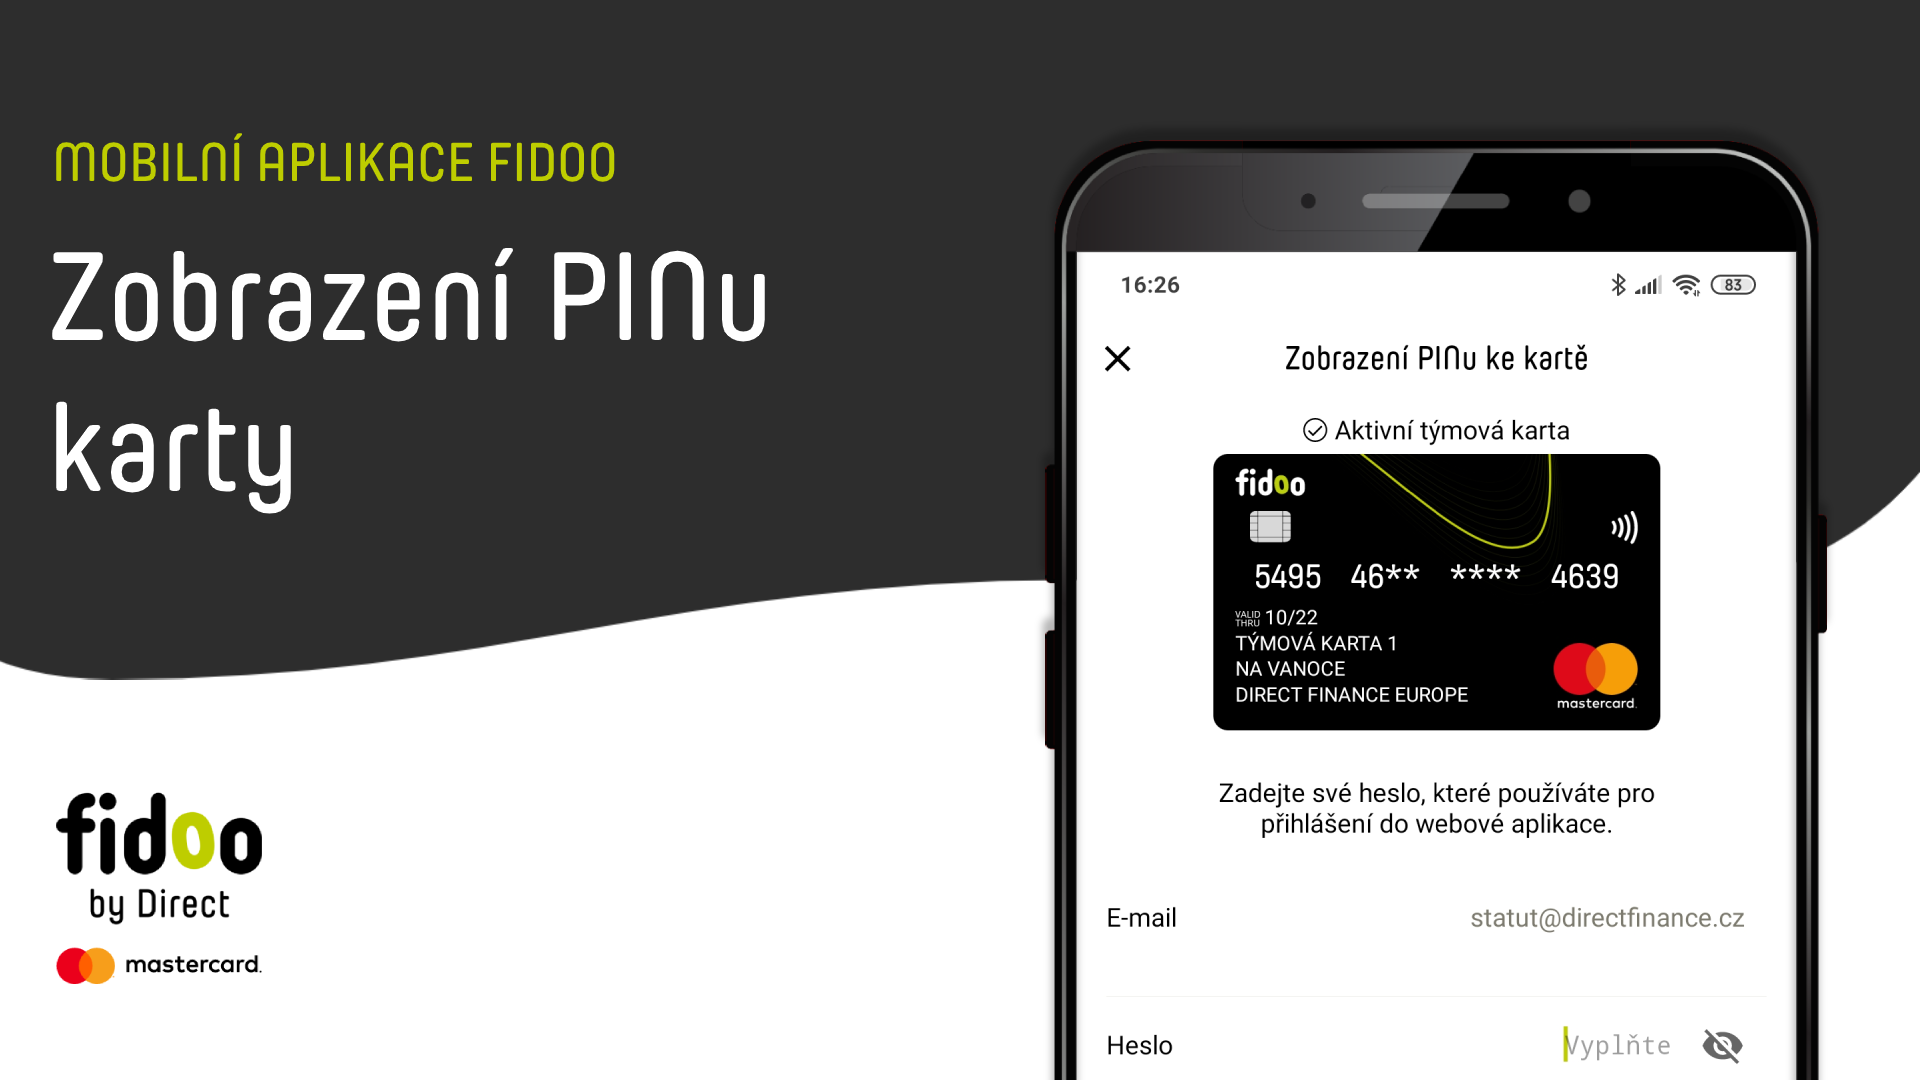
  1. Bottom menu – Cards – click on the card you want to know the PIN for.
  2. Click Show card PIN and enter your app login PIN or biometric.
  3. Confirm with the Authorize button.
Zobrazení PINu v mobilní aplikaci Fidoo
Play Video

Change your card PIN

  1. Insert the card into the ATM and enter the old PIN.
  2. Select Change PIN and follow the ATM instructions.

Unblocking a PIN-locked card

Web app 

  1. Section My Finances Cards – If you have multiple cards, go to Card Information and click on the card you want to unblock. 
  2. In the yellow bar on the right side of the screen, select Unblock and confirm. 

Mobile app 

  1. Bottom menu – Tabs – click on the card you want to unblock. 
  2. Click on Unblock PIN and confirm. 

Card acceptance and activation

Activating a new card

Play Video

Web app

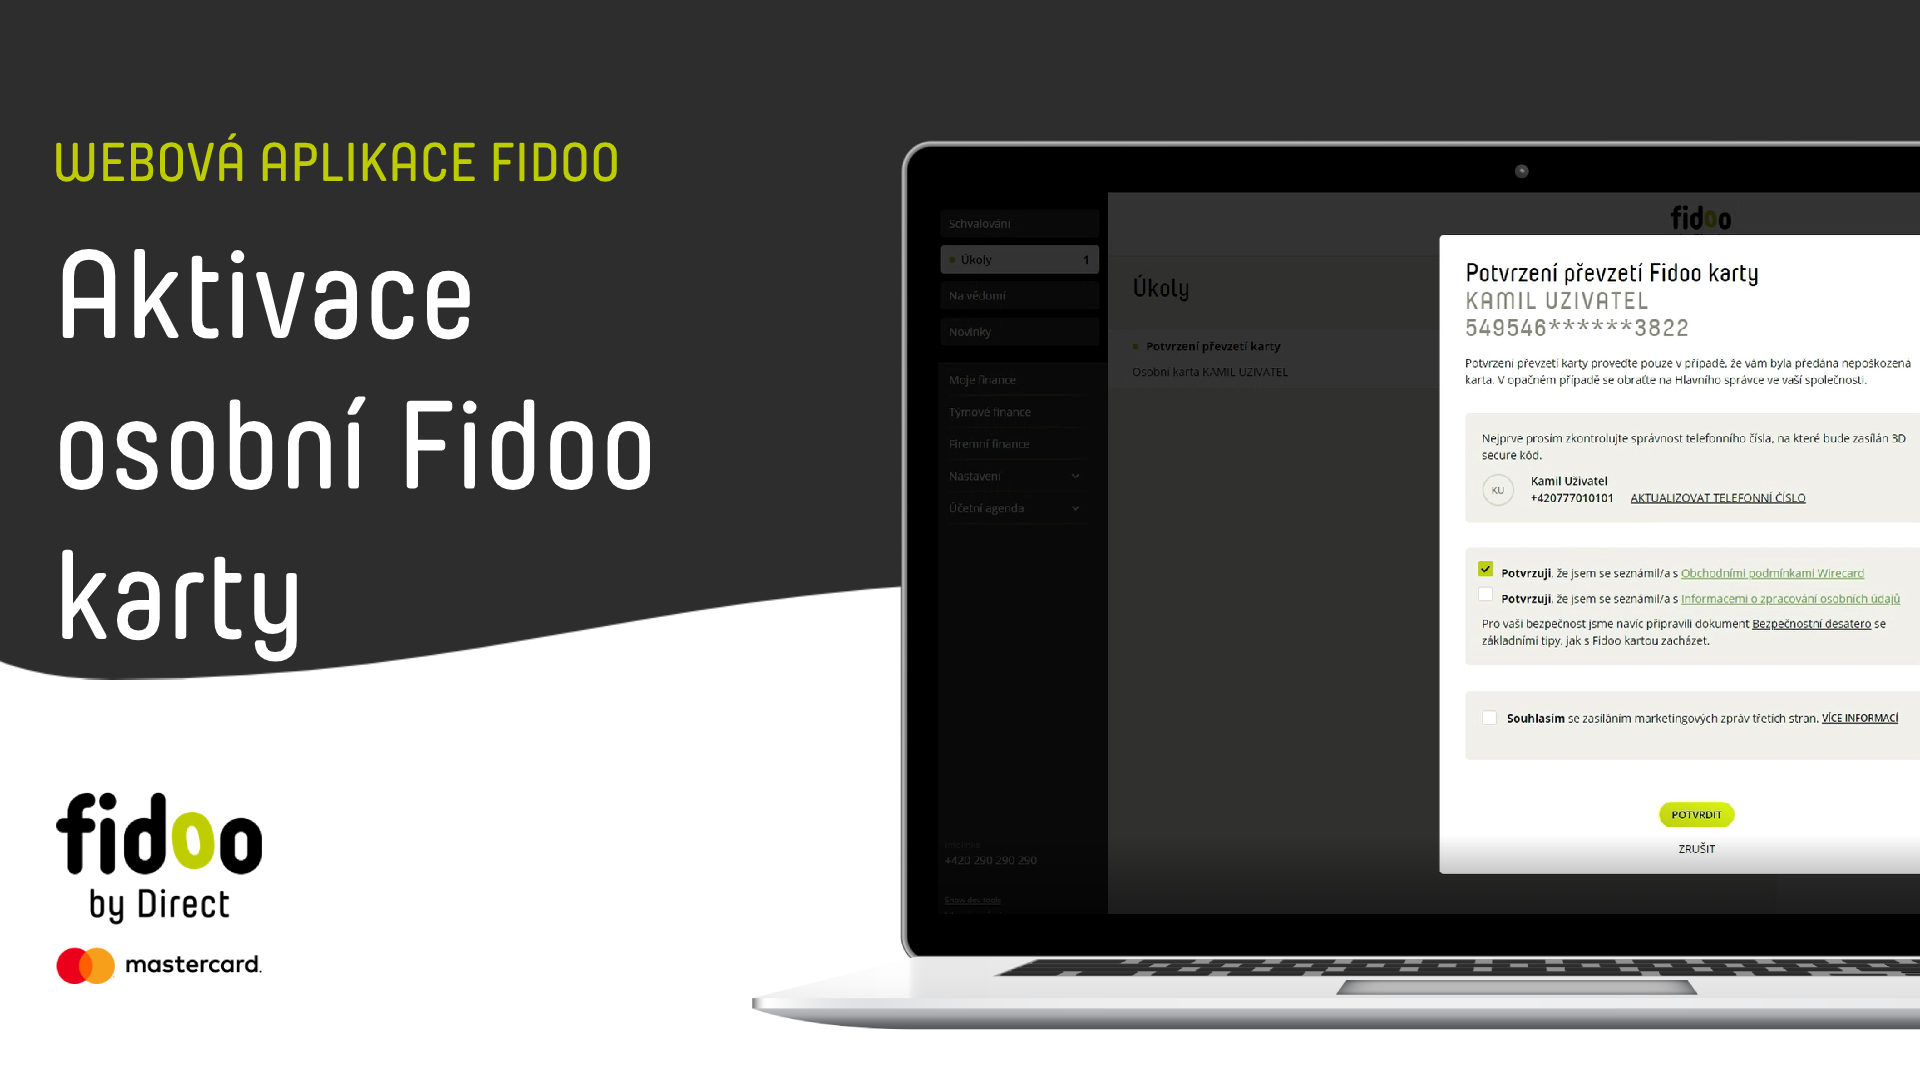
  1. Section TasksCard Acceptance ConfirmationOpen.
  2. Check the Receipt Confirmation box and type Confirm.
  3. Enter the password you use to log in to the app, the card PIN is displayed and the card becomes active.
Play Video

Mobile app

  1. Bottom menu Next – Tasks – click on the Card Acceptance Confirmation task .
  2. Check the box with acceptance confirmation and select Accept Card.
  3. Enter the password you use to log in to the app or your biometric and select Authorise.
  4. The card PIN is displayed and the card becomes active.

Fidoo Card Activation FAQ

A prepaid Mastercard issued to an employee (as a personal card) or to a team (as a team card). You can pay with it all over the world – or wherever Mastercard is accepted.

The Fidoo card is neither debit nor credit, it is prepaid. You can top up your Fidoo account using the Fidoo app and you can only spend up to the top up amount.

The card can only be activated by the user who is listed as the cardholder Only this person can find the task to take over a new or renewed card in his/her application.

My profile

Each Fidoo user has a profile where they can manage and set up their information.

Change of telephone contact

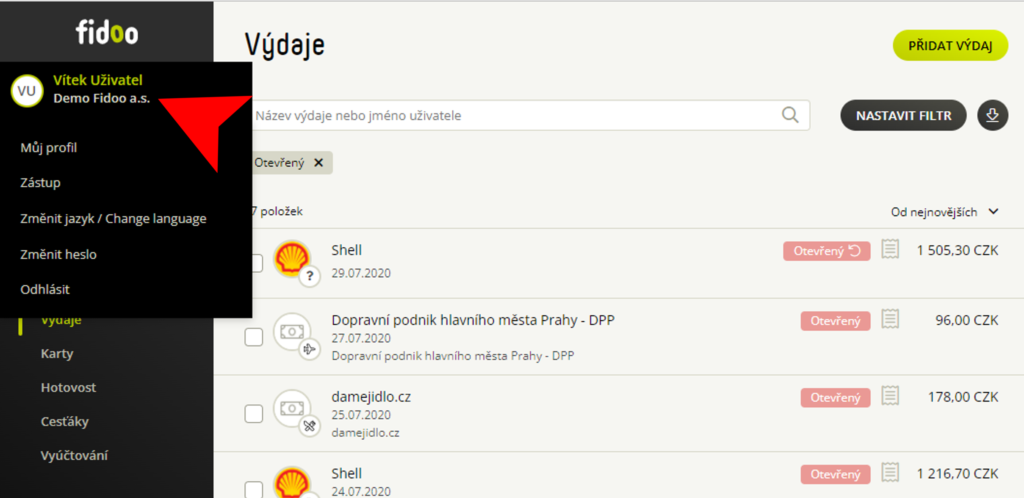
  1. In the web app, click on your name (top left) – My Profile – the green Change icon icon next to your phone number.
  2. Enter the new phone number and Save number change.
    Change your phone number
  3. Enter the six-digit code you received for your new phone and go on.
  4. In case you do not have access to the application, please request a change of telephone contact for the main administrator of the application.

Setting up the Shortcut feature

  1. In the web app, click on your name (top left) – Proxy.
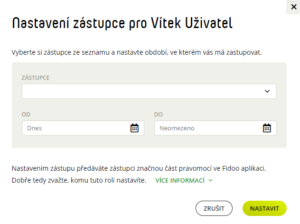
  2. Select Add Shortcut, select a shortcut from the list of users, and enter the shortcut time.
    Setting up a crowd
  3. Confirm with the Set button.

Adjusting the queue time

  1. In the web app, click on your name (top left) – Proxy.
  2. For the shortcut you want to edit, select Edit.
  3. Adjust the time and confirm with the Set button.

Termination of the crowd

  1. In the web app, click on your name (top left) – Proxy.
  2. For the queue you want to terminate, select Terminate.
  3. Confirm with the End Shortcut button.

Login to the account of the represented person

Web app

  1. Click on your name (top left) – Switch user.
  2. Select the user you want to represent.

Mobile app

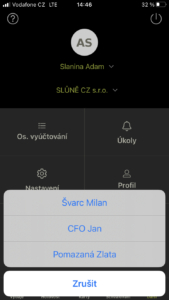
  1. After logging in, information about the possible crowd will appear for a few seconds, click on
    Switch
    or select

    Next.


  2. Click on your name in green and select the person you want to represent.

Setting up notifications in a queue

  1. Click on your name (top left) –
    My profile.
  2. Select a tab
    Notifications.
  3. If you have notifications set up on your company, tick
    Individual settings.
  4. Scroll through to turn on/off the Notifications section of the Tab, and
    Save
    .

Frequently asked questions about representation

You will always receive an informational email when you set up, change or terminate a shortcut.

Web app

  1. Click on your name in the top left corner.
  2. Select Back to my account from the menu. The app will then switch you to your account.

Mobile app

  1. Click on Next and the name of the person you are representing in green.
  2. Select My Profile.

The moment you switch to the represented profile, the personal profile field turns purple. You can get back to your account the same way.

The representative will see and do almost everything that the represented user is entitled to. However, there are some sensitive areas that the representative will not be able to access or see, but will not be able to edit.

In the profile of the represented user:

  • change password
  • view of sensitive information
  • modifications in the profile
  • permanent card blocking and PIN display
  • acceptance of the renewed card

Generally in the application:

  • setting roles and rights
  • approval settings
  • view of Fidoo account
  • charging cards
  • AML acts

Change language version

Web app

  • Click on your name (top left) – Change language and select.

Mobile apps for iOS

  1. On your phone, select Settings and find the Fidoo app.
  2. Click on Language and select the variant you want to use.

Mobile apps for Android

The Fidoo app is set up according to the language settings on your phone as follows:

  • The phone is set to Czech and Slovak language, the application is in Czech.
  • The phone is set to any other language, the app is in English.

Change your login password

  1. In the web app, click on your name (top left) – Change password.
  2. Enter the original and new passwords and confirm with the Change Password button.

Switching between multiple companies

If you are elected as a so-called. super user, you will receive an email accepting or rejecting the role.

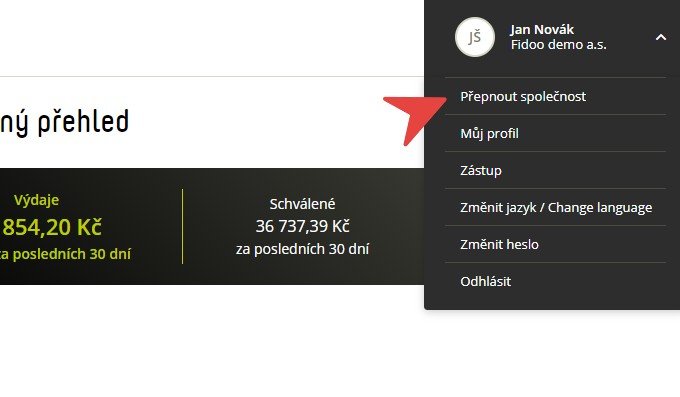
  1. In the web app, click on your name (top left) – Switch company.
    Switching companies in FIdoo
  2. Click on the selected company to be redirected.

Notification settings

  1. In the web app, click on your name (top left) –
    My profile.
  2. Select a tab
    Notifications
    and tick
    Individual settings.

  3. Slide the button

    /


    to turn on/off


    messages or notifications, and


    Save


    .

Frequently asked questions about my profile

The main administrator provides support to all users of the Fidoo application. So if you need to find out who in your company has this role, do the following:

  1. Log in to the web app.
  2. In the bottom left corner, click Main Administrators.
  3. This will open a window with information about the administrators.
  1. Make sure you’ve set up notifications to be sent directly to you in the downloaded Fidoo mobile app:


    Next – Settings – Push notifications
    – The slider is on (shown in green)
  2. Check the notification settings on your phone:

    Settings – Notifications
    – Find and select the Fidoo app.
    Enter
    Find and select Fidoo and select Fidoo.
    .

Sometimes it happens that when the phone with iOs is set to “silent mode” i.e. has the side button switched in the down position (you can see red) – push notifications are not displayed.

Notification Centre

There are 4 sections in Fidoo on the left side where you will receive notifications if Fidoo wants to tell you something.
Fidoo Notification Centre

Approvals

  • Approval only applies to the role of Approver.
  • There you will be notified if you have any items to approve.
    Notification Approval

Tasks

  • Necessary actions that you should do because if you don’t do them, something will happen or something is stuck.
  • This could ben, for example:
    Notification tasks
  1. User identification requirement (AML proxy role only)
  2. Setting rights for users (Main Administrator role only)
  3. Taking over a Fidoo card

Note

  • Here is the information regarding your transcriptions.
  • For example:
    Notification Noted
  1. Alerting the financial administrator of a decrease in the available balance.
  2. Expiry of the crowd time
  3. Information about the money transferred to the Fidoo account for the financial administrator.

News

  • Here is some information you might find useful.
  • For example:
    Notification new
  1. Invitations to workshops
  2. Information about new functionalities

Types of Fidoo cards

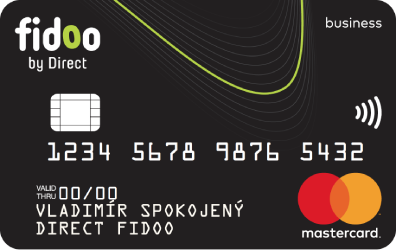
The Fidoo card is a classic payment card from Mastercard. The card allows classic payments at a merchant’s terminal, ATM withdrawals or online payments.

Personal Fidoo card

  1. If your name is on the card, it is a personal card.
  2. Only you use this card.

Team Fidoo card

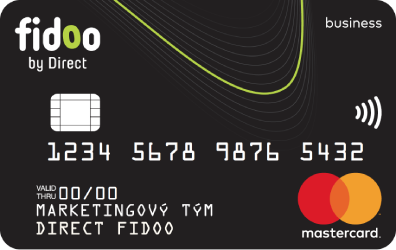
  1. If the card has a team name or a license plate number instead of a name, it is a team card.
    The team card can be named at your discretion, but it must not be the name of the app user to avoid confusion with a personal card.
  2. The team card is shared and can be passed around within the team and can be used by anyone in the team.
  3. However, a team card always has only one holder who is responsible for it.

More about Fidoo cards

Want more information about Fidoo cards? We’ve got the support to do it own separate section.

My card settings

To view the card settings

Web app

  1. My FinanceCards – If you have more than one card, select the card you want to view.
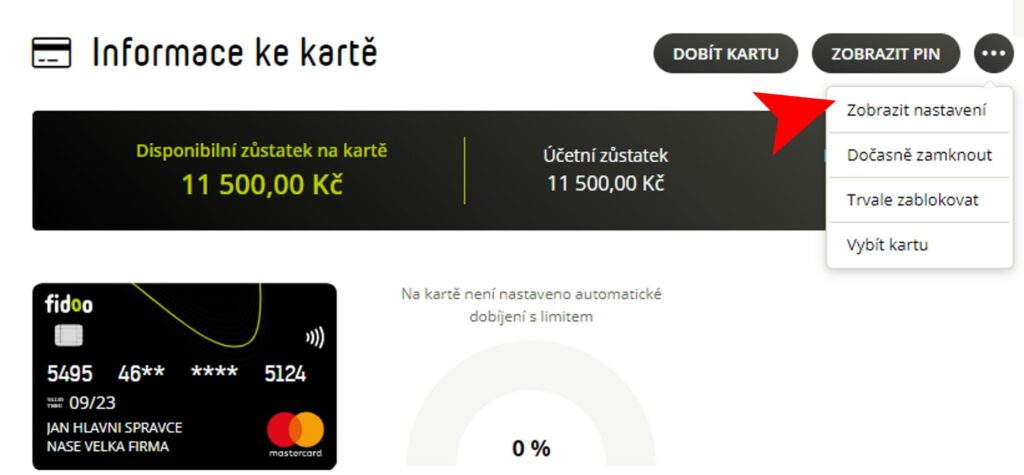
  2. Click on Settings icon (top right) and select Show settings.

Mobile app

  1. Bottom menu – Tabs – click on the tab you want to view.
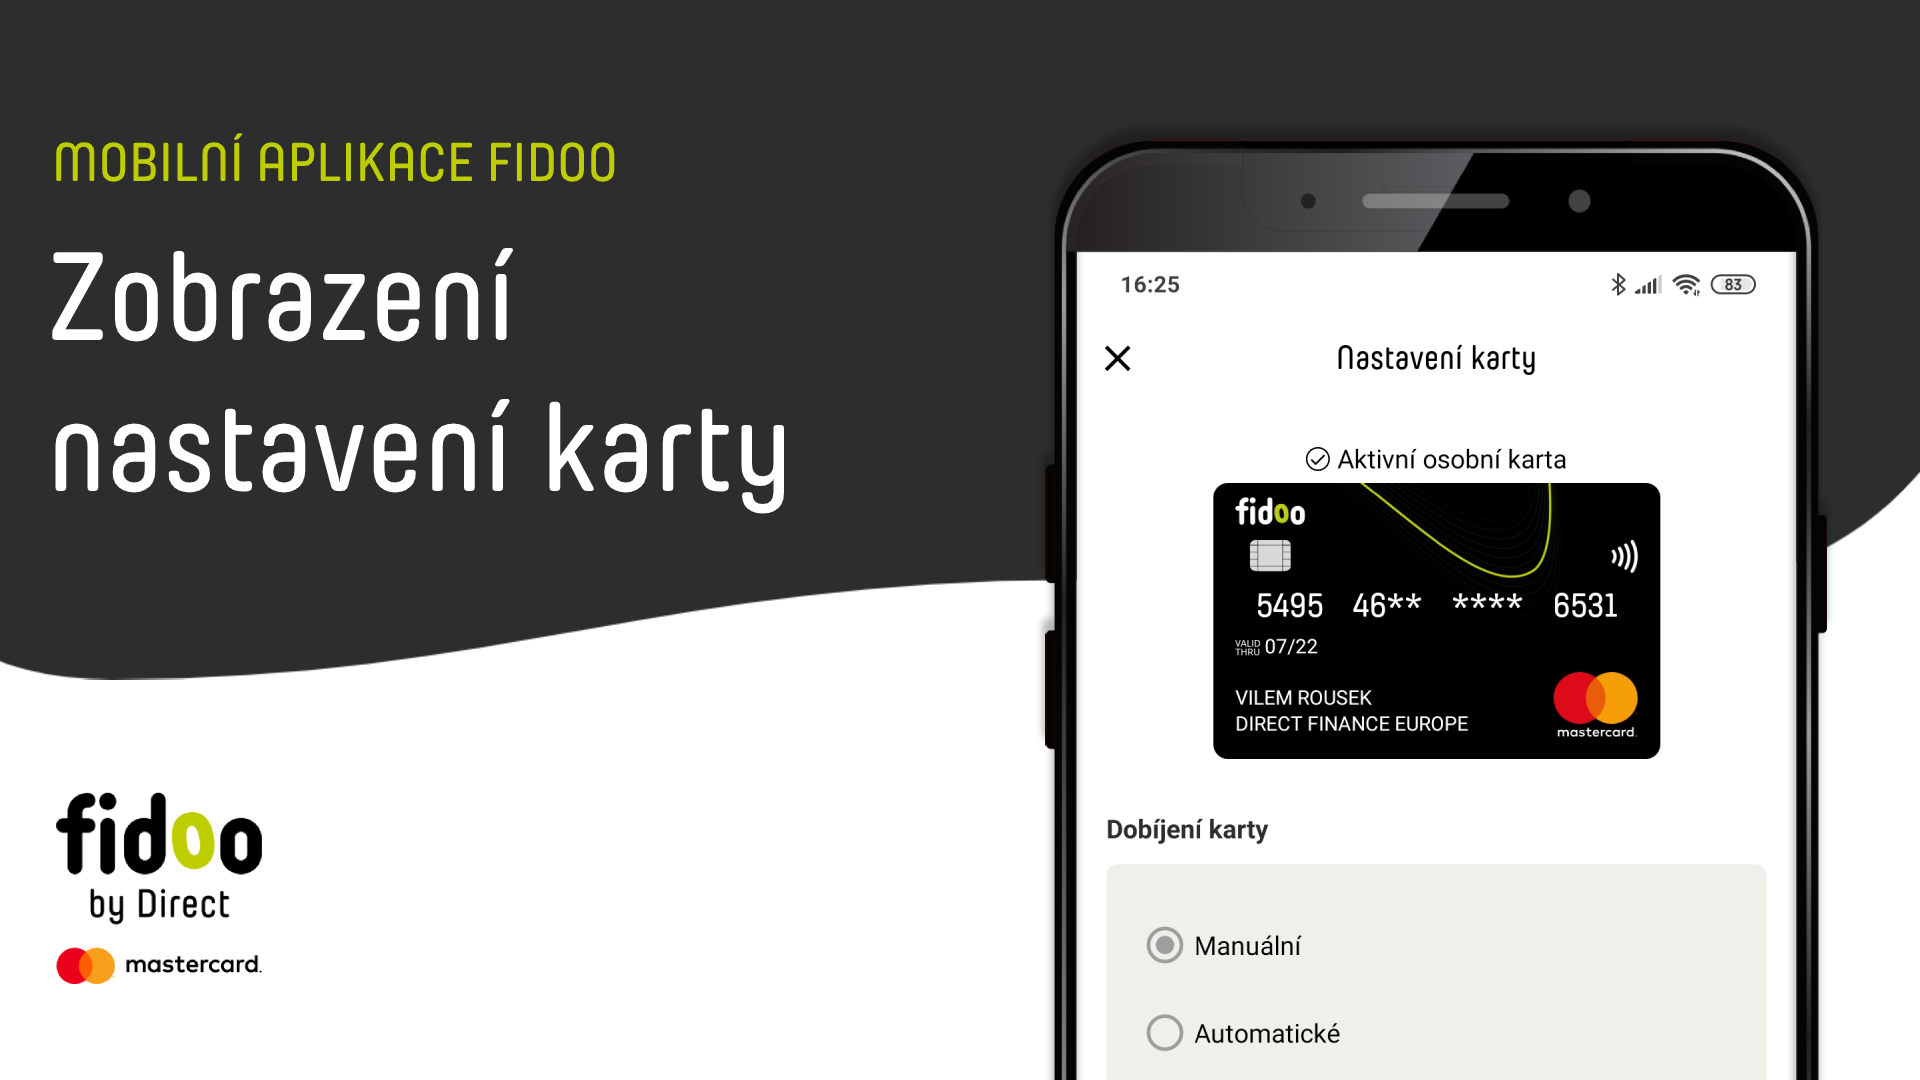
  2. Click on Settings icon and select More actionsCard settings.
Play Video

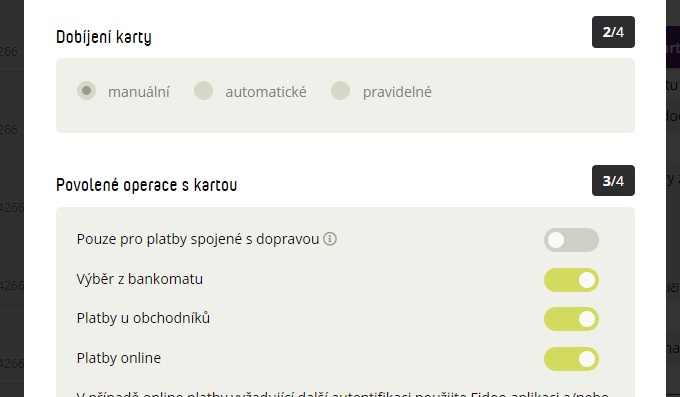
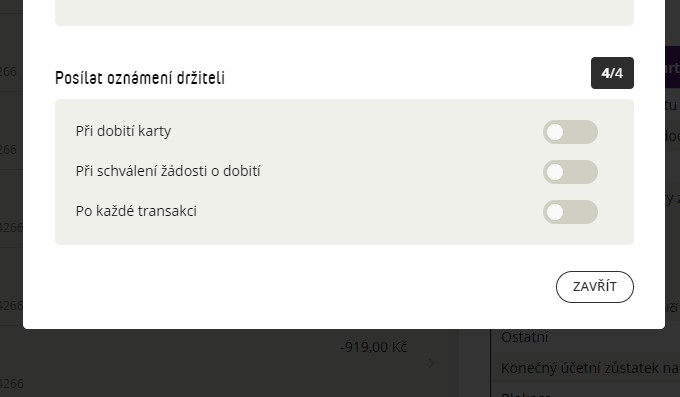
What you can see in the card settings

  1. Real card preview
    – Information about who is the current cardholder and who is the card administrator (you can only see in the web version).
    – Alias cards (only visible in the web version).
  2. Information about the charging type set
  3. Information about the options set for using your card for payments
  4. Information on how to set up emails when a top-up, top-up request or payment is approved

Fidoo card settings Fidoo card settings Fidoo card settings

Locking the card

Web app

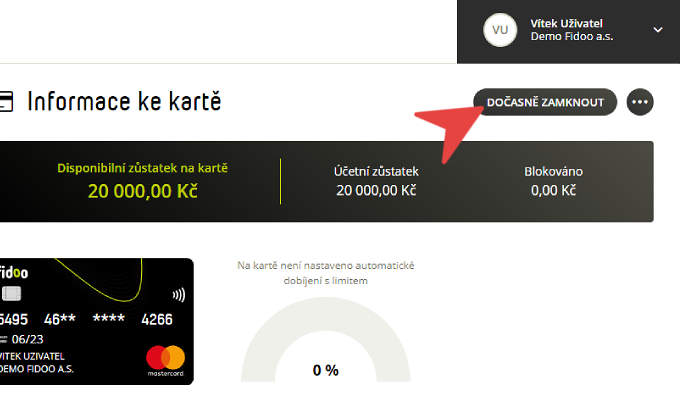
  1. My FinanceCards – If you have multiple cards, go to Card Information and select the card you want to lock.
  2. Click to  and enter Temporarily lock

    , or select the Discharge card at the same time check box and confirm with the Lock button.
    Lock your card on the web

Mobile app

Play Video
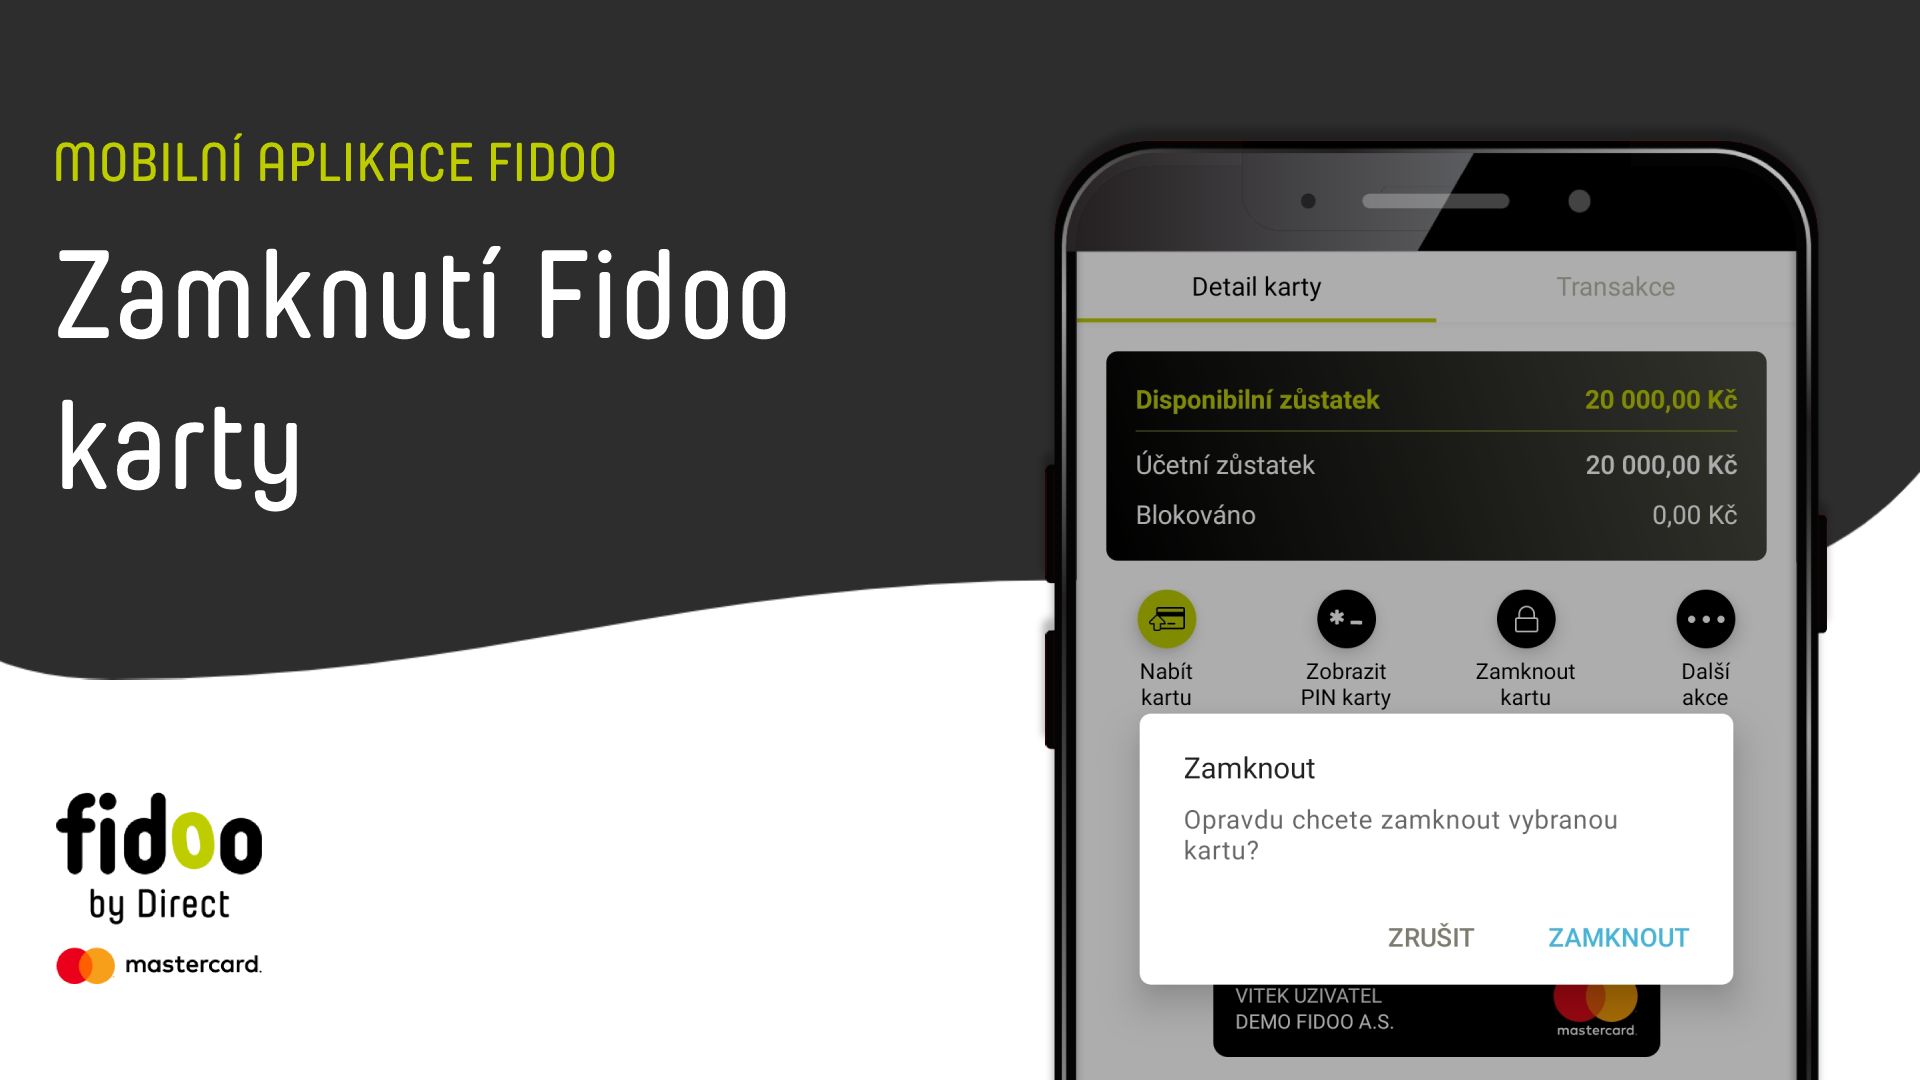
  1. Bottom menu – Tabs – click on the tab you want to lock.
  2. Click Lock tab and confirm with the Lock button .

Unlocking the card

Web app

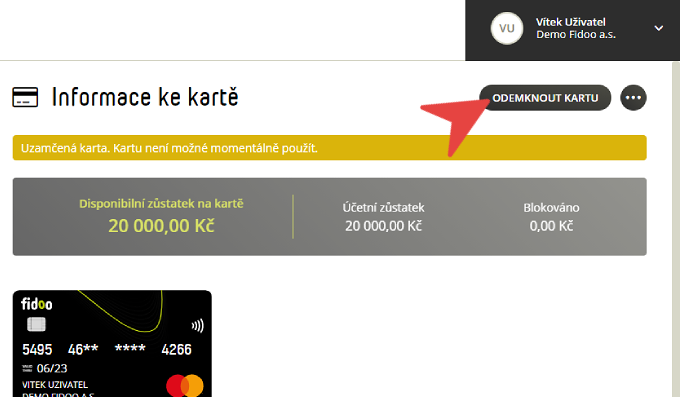
  1. My FinanceCards – If you have more than one card, go to Card Information and select the card you want to unlock.
  2. Click Unlock tab (top right) and confirm with the button.
    Unlocking your card on the web

Mobile app

Play Video
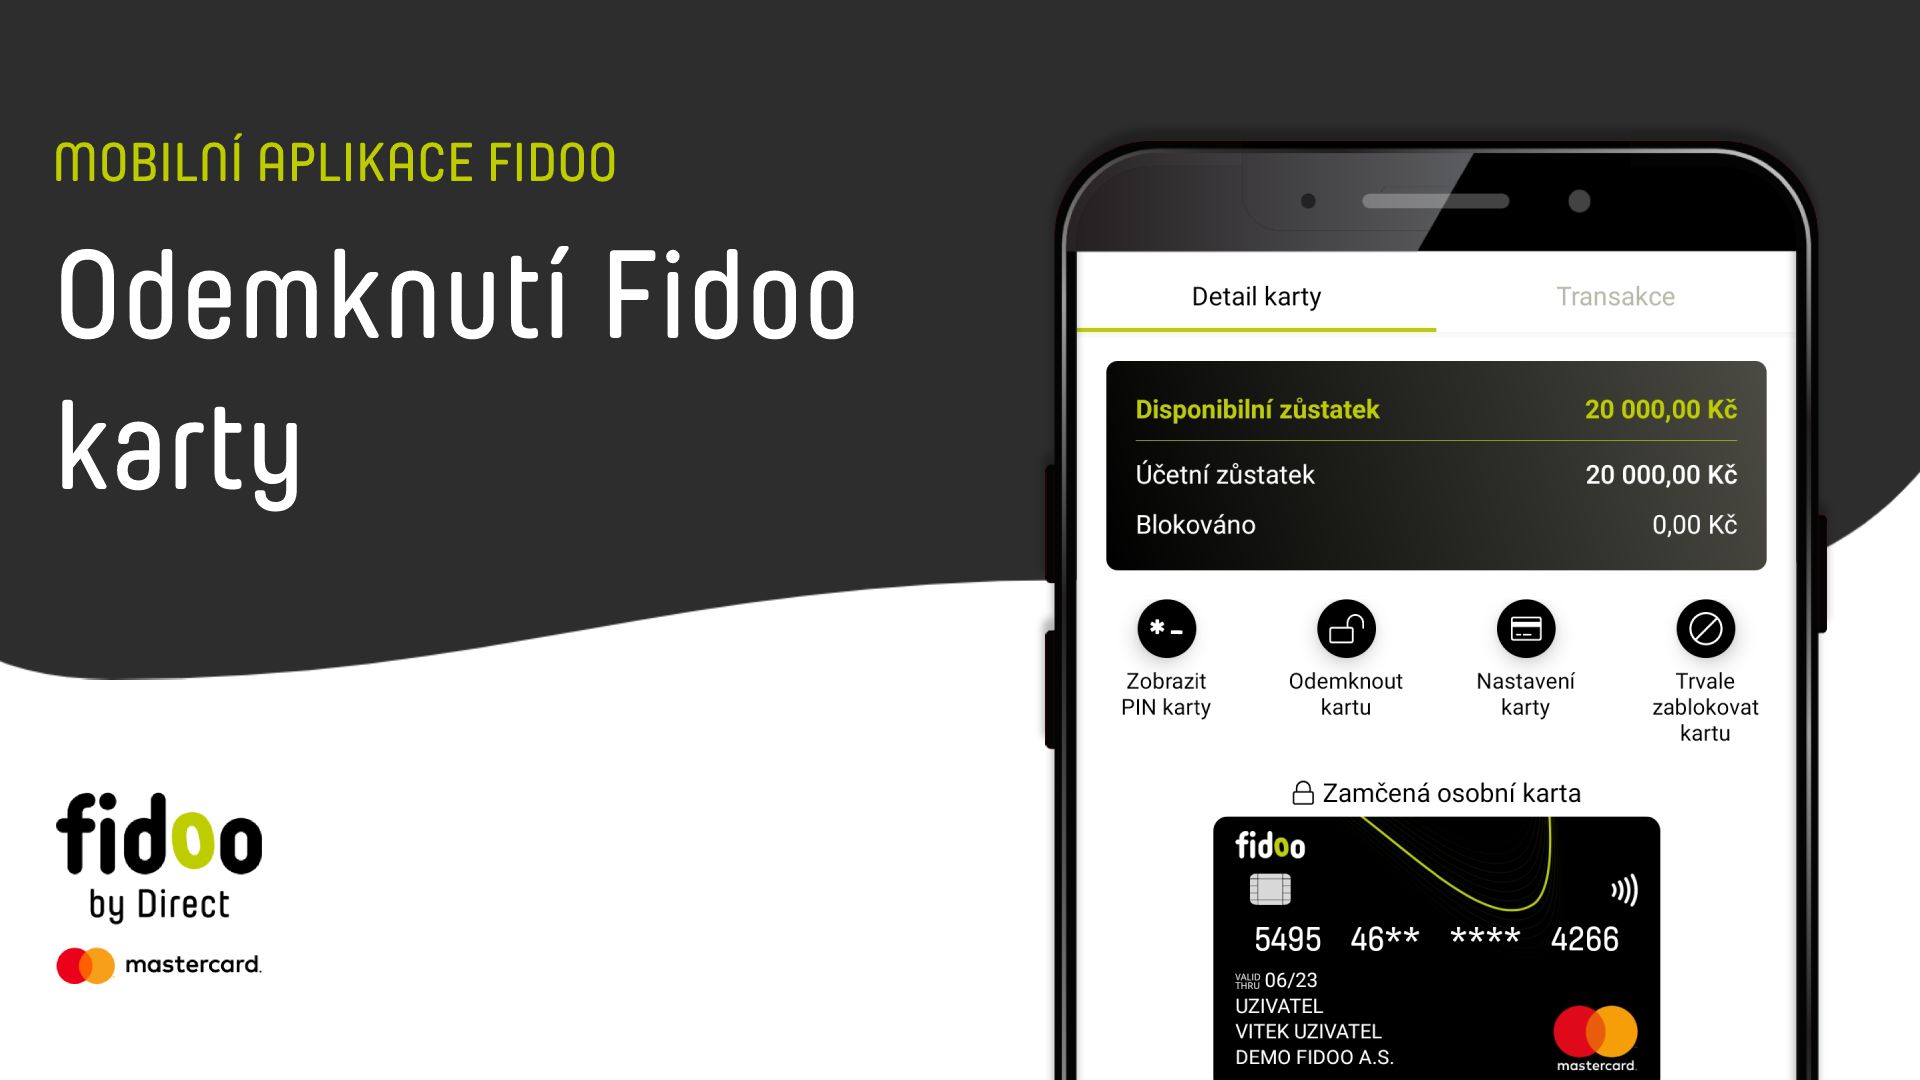
  1. Bottom menu – Tabs – click on the card you want to unlock.
  2. Click Unlock card.

Unblocking a PIN-locked card

Web app

  1. Section
    My Finances

    Cards
    – If you have multiple cards, go to Card Information and click on the card you want to unblock.
  2. In the yellow bar on the right side of the screen, select
    Unblock
    and confirm.

Mobile app

  1. Bottom menu –
    Tabs –
    click on the card you want to unblock.
  2. Click on
    Unblock PIN
    and confirm.

Permanent blocking of the card

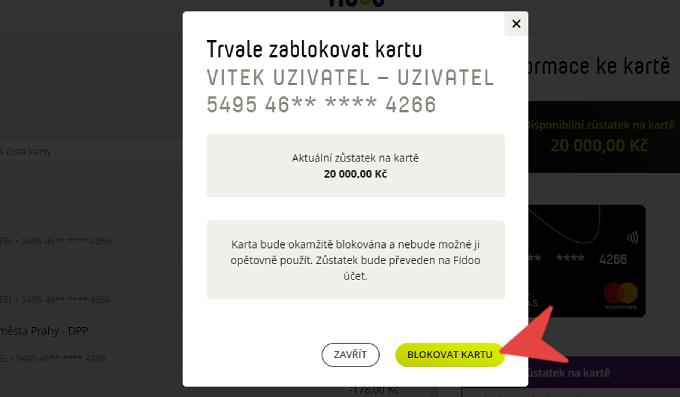
  1. My FinanceCards – If you have multiple cards, go to Card Information and select the card you want to permanently block.
  2. Click on Settings icon (top right) and select Permanently block.
  3. Confirm with the Block Card button .
    Blocking cards on the web

Receiving a team card

Web app

  1. Section TasksConfirm change of holder Open.
  2. Check the Receipt Confirmation box and type Confirm.

Mobile app

  1. Bottom menu More Tasks Card Acceptance Confirmation.
  2. Check the Receipt Confirmation box and type Confirm.

Handing over the team card

Web app

  1. My Finances – Cards – If you have multiple cards, go to Card Information and select the card you want to transfer.
  2. Click on Settings icon and select Change Holder.
  3. Select the holder and enter Continue.

Mobile app

  1. Bottom menu – Cards – If you have more than one card, select the card you want to pass on.
  2. Click on Settings iconand select Change Holder.
  3. Select the holder and enter Change.

Frequently asked questions about the web or mobile application

  • Locking the card is temporary and the card can be unlocked and used again.
  • The permanent block is final and the card cannot be used in the future.

Web app

  1. Under My/Corporate FinanceCards, you will see Card Information on the right side of the screen.
  2. This section shows the balance on the card.

Mobile app

  1. In the Cards section, click on a specific card.
  2. The app will show you information about the balance on the selected card.

Modify and send the expenditure for approval

Web app

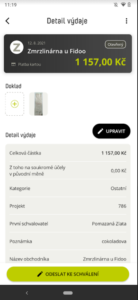
  1. My Finances – Expenses – click on the expense and select Edit.
  2. Fill in the necessary details and select Save or Save and submit for approval.

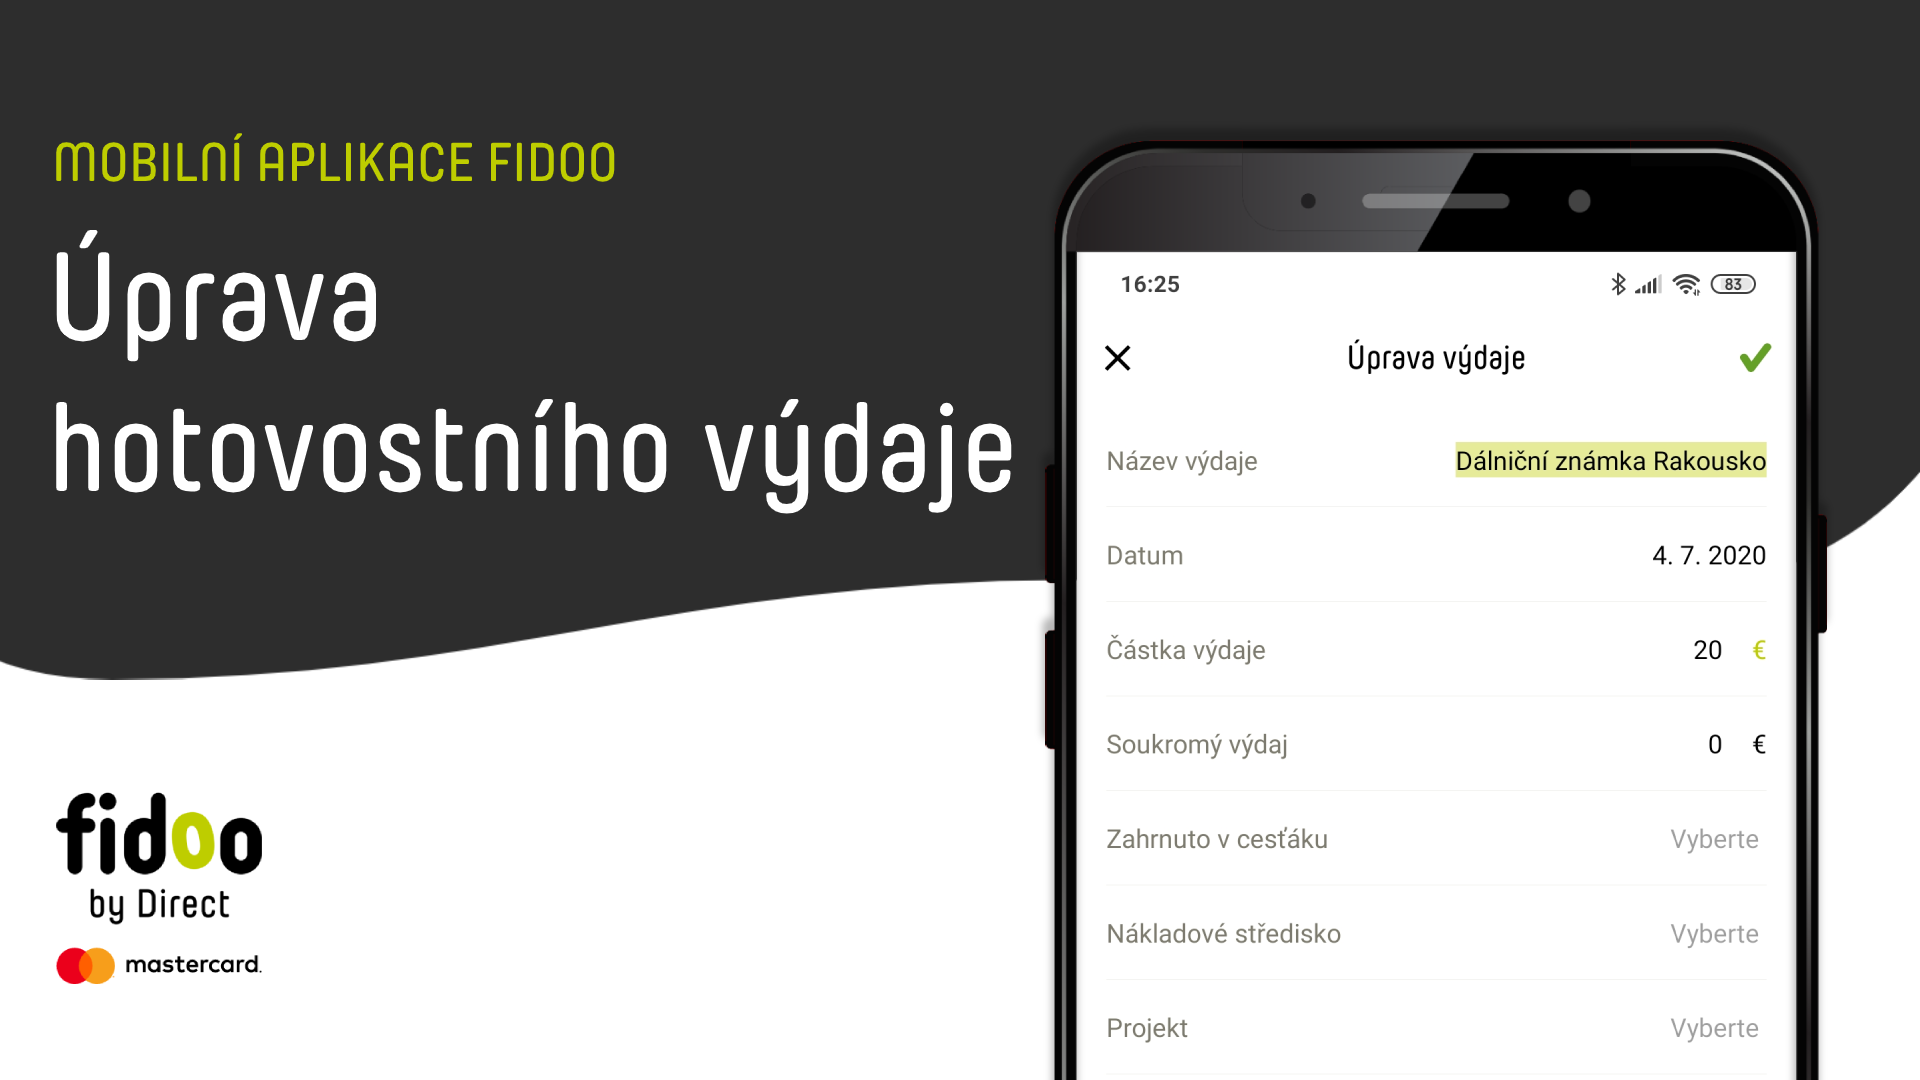
Mobile app

Play Video

  1. Log in to the app
     or select Expenses in the bottom menu.
  2. Click on the expense and select Edit.


  3. Complete mandatory data and select Submit for approval.

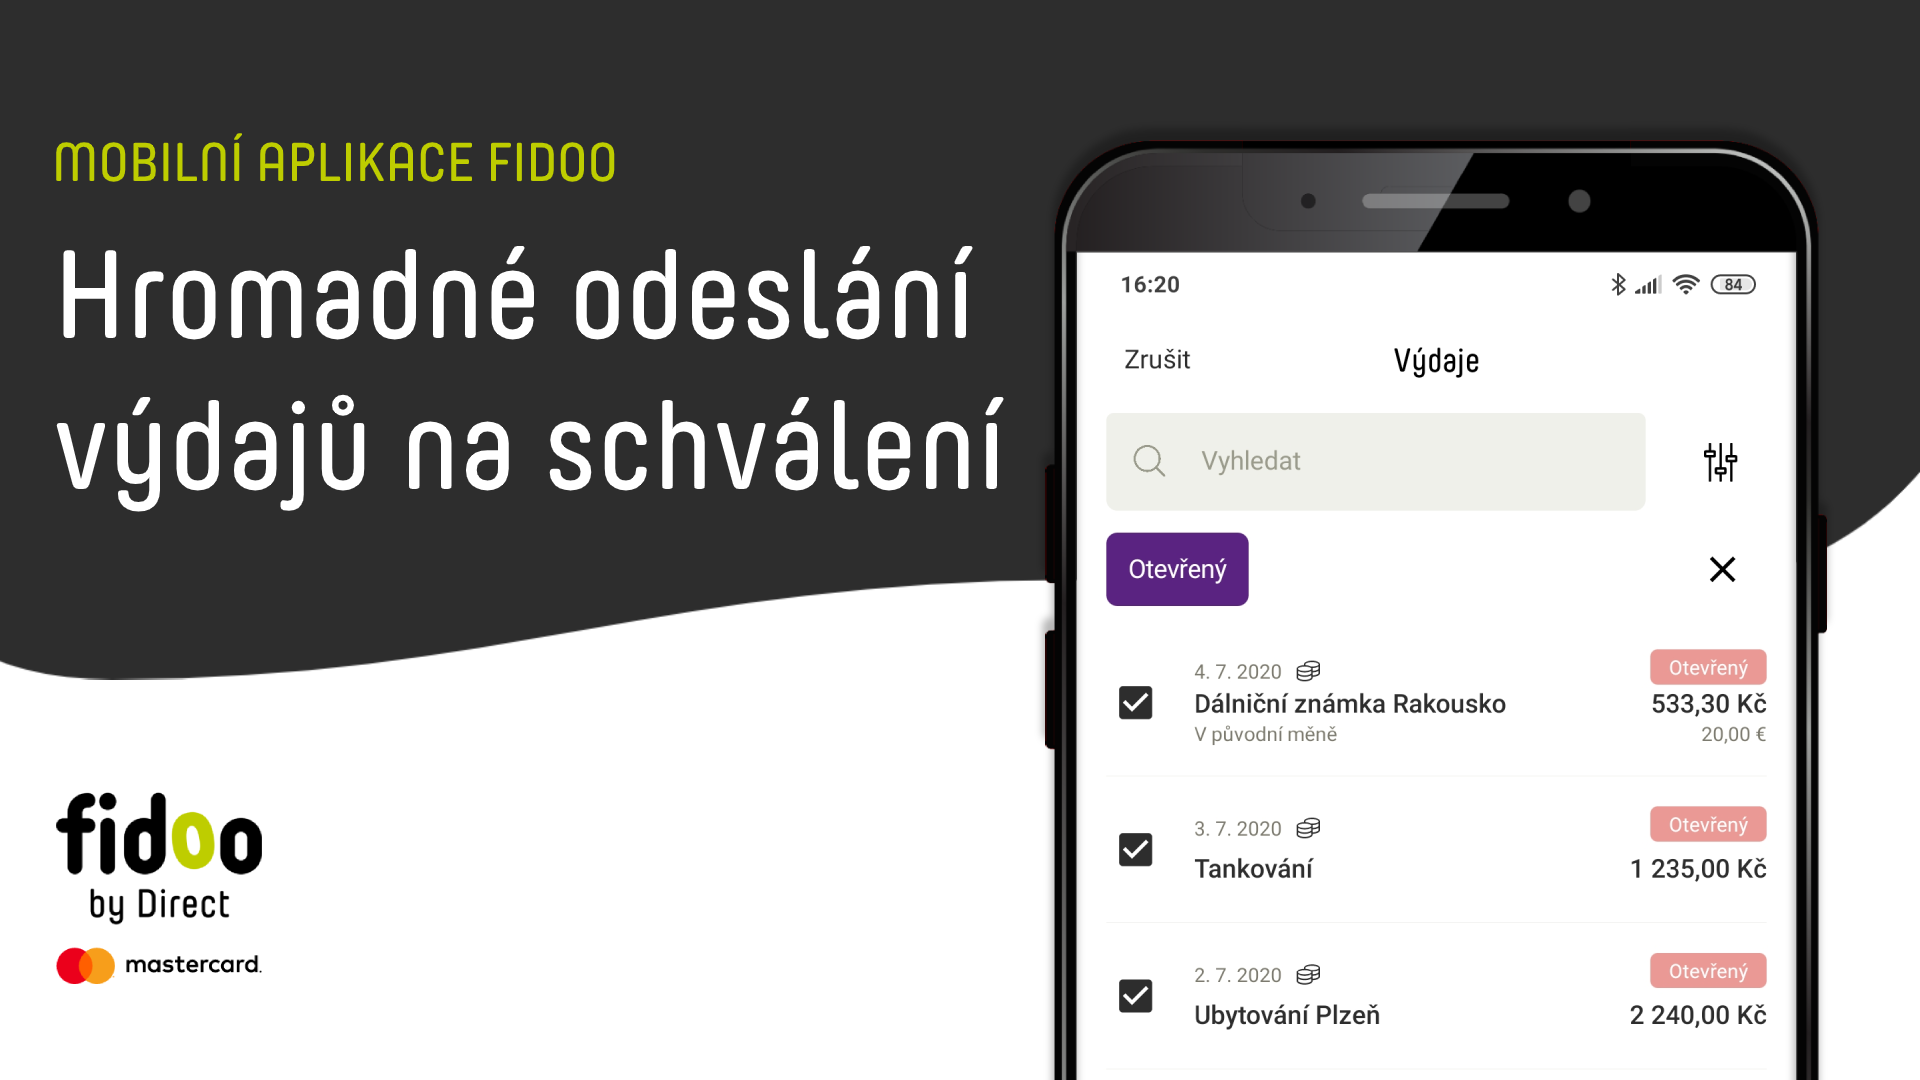
Bulk send expenses for approval

Play Video

Required fields

The permanently set mandatory fields are:

  • Name of expenditure
  • Date of expenditure
  • Amount

Without this information, you will not generate an expense.

The optional mandatory fields are:

  • Cargo centre
  • Note
  • Project
  • Receipt

Do not send an expense for approval without this information.

Frequently asked questions about the web or mobile application

  • The basic mandatory fields will be filled in by card payment. If you are creating a cash expense, the application will not allow you to create an expense without entering this information.
  • The optional mandatory fields are set by the company and the company informs you of their settings. If you do not complete this field, the application will notify you when you submit the expense for approval and will not send the expense.

Cost centres can be added to an expense by the expense owner (the one who created the expense) or by the Accountant in the expense edit.

  1. In My/Corporate Finance, select any expense.
  2. On the right side of the screen you will see the detail of the expense along with a button with three dots.
  3. Clicking on this button will take you to the details of the expenditure.
  4. You can add a cost centre to an expense in the Advanced Information section.

You can add as many cost centres as you like to a single expenditure. However, you can always choose only from those that have already been set up for your company by the Accountant.

You can edit an issue when it is in the Open status – i.e. not sent to a supervisor or accountant for approval. If the expense shows as Approved, contact the person in your company with the Accounting role who can reject the expense. This will return its status to Open and you will be able to edit the expense, or in the case of a cash expense you have the option to delete the expense.