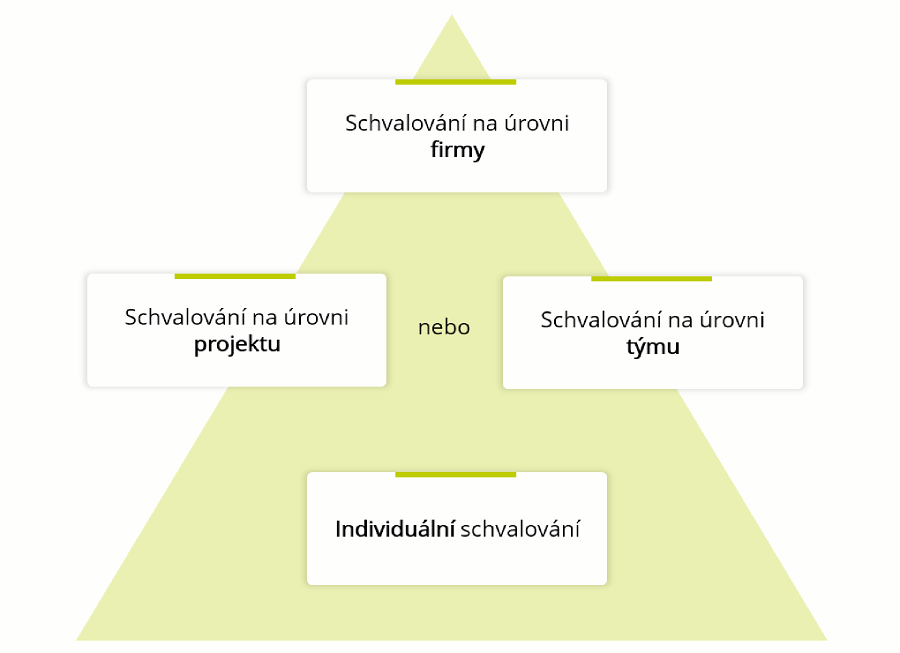
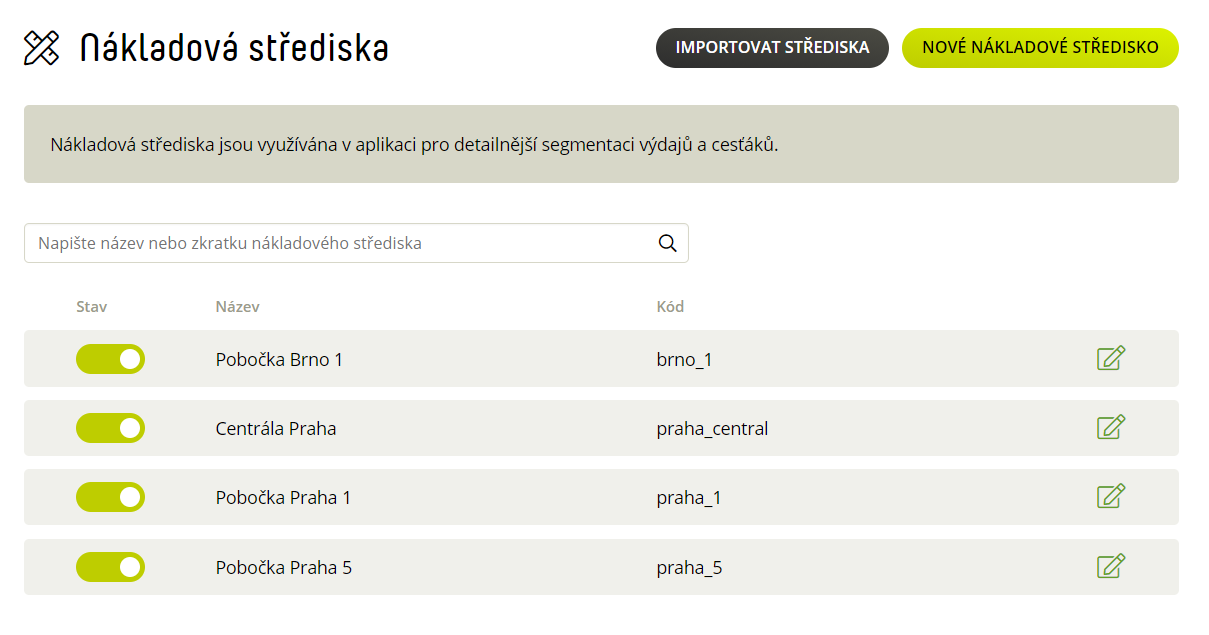
Cost centres and projects
Download the sample import file and add the name and abbreviation of the centre or project
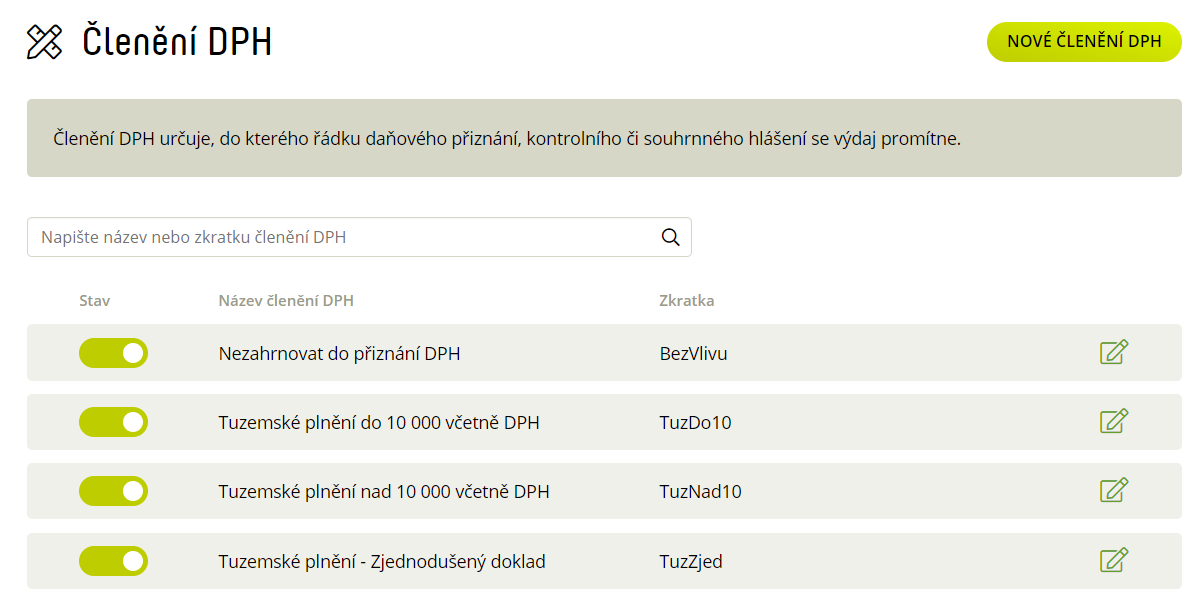
VAT breakdown and pre-contraction
Prepare a list of VAT breakdowns and precharges that you will allocate to expenses.
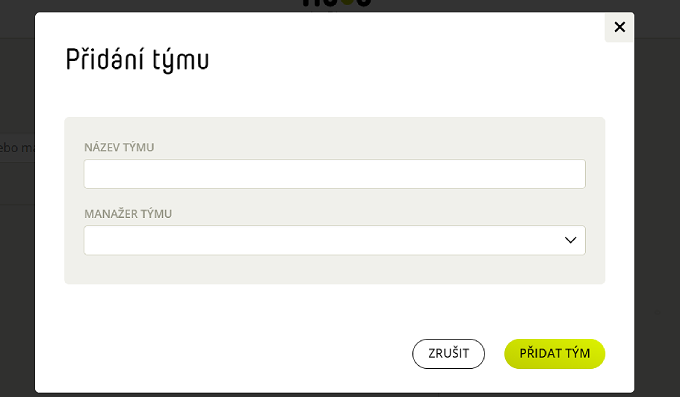
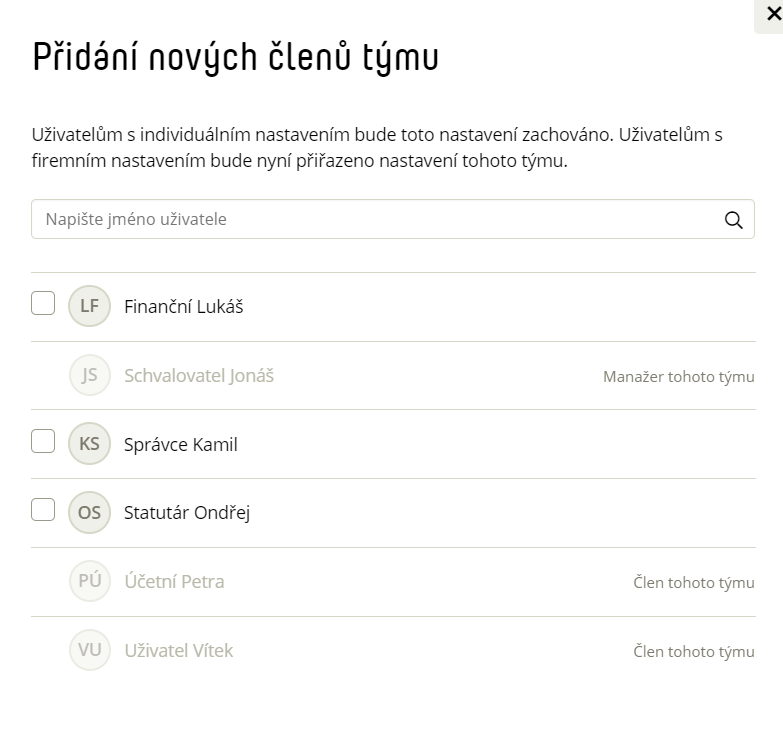
 , select Add Team Members and select them from the list of users in the app.
Manual settings:
Import list of resorts:
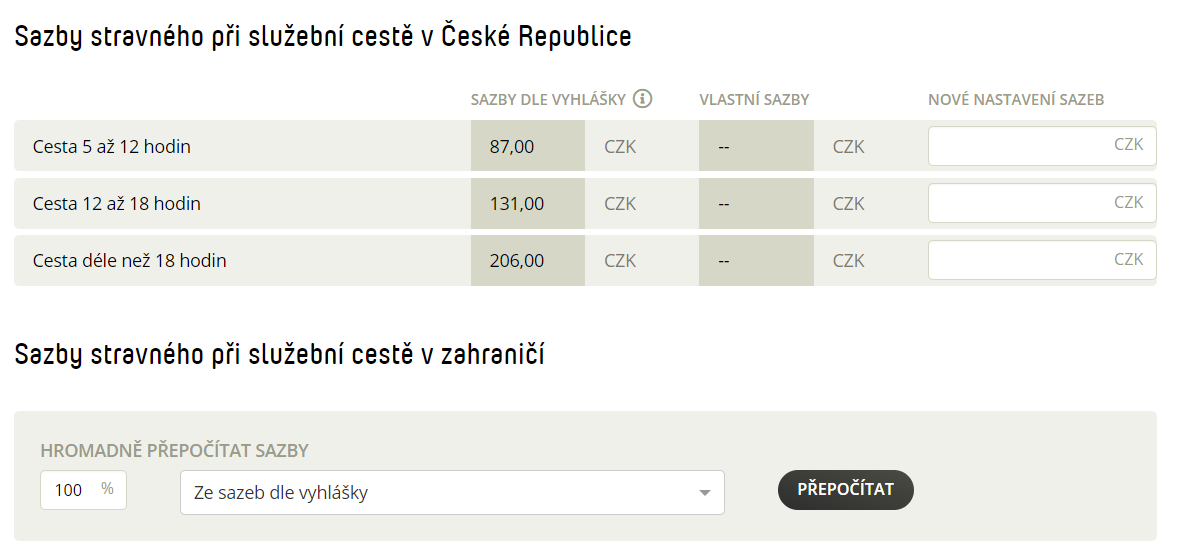
You can adjust the foreign meal allowance:
a) Bulk – enter the percentage of the meal allowance and select Recalculate.
b) Individually – in the search window, type the country for which you want to adjust the meal allowance and change the rate for the selected country.