Travel reports

Setting the meal allowance

The meal allowance rates listed in the application are set according to the Labour Code. However, you can adjust them higher as follows:

  1. Section SettingsCredits MealsCreate new (top right).
  2. Write the name and select the validity, add the new domestic meal allowance rates.

    You can adjust the foreign meal allowance:
    a) Bulk – enter the percentage of the meal allowance and select Recalculate.
    b) Individually – in the search window, type the country for which you want to adjust the meal allowance and change the rate for the selected country.

  3. Save.

Setting your pocket money for a trip abroad

  1. Settings Honours Pocket Money – activate Pocket Money in the system (top right).
  2. Choose to calculate your pocket money before or after the reduction of foreign diets.
  3. Enter the percentage of your pocket money and select Recalculate.
  4. Save.

Mandatory field settings

  1. Section
    Settings – Honourings – Required fields
  2. Use the button button to enable/disable the obligation to add a specific data to the expenditure.

Integration to accounting software

Preparing for integration

  1. Find out which accounting system you will be transferring the data to.
  2. Check out our website(Exports and Integration) to see what data transfer options we offer for your accounting system.
    Detailed instructions for each accounting system can also be found below in the Supported Systems section or in the Accounting Instructions ( Exports and Integration section).
  3. If you do not know how to set it up, please contact the customer service line (+420 290 290 290).

Supported systems

Money S3

  1. Section Settings – Integration.
  2. Click on

    , fill in the cashier and account name and Save.

Connecting via API

The Fidoo public API provides comprehensive information about the data that is contained in the Fidoo cloud application and can be distributed and exchanged with any system thanks to this API. The current version of the Fidoo API is located athttps://api.fidoo.com/v2/and includes:

  • Monitoring of card transactions
  • Application user reports
  • Overview of Fidoo cards
  • Orientation in parameters and balances on Fidoo cards
  • Creating a new user and ordering a personal Fidoo card
  • Load and unload personal and team cards

To access the data via the public API, you need to obtain an API key. This can be generated by the master administrator in the Fidoo application.

Teams

Team formation

  1. SettingsTeamsAdd Team (top middle) .
  2. Name the team, select its manager and click Add Team.
    Adding a new team in Fidoo
  3. Click on 
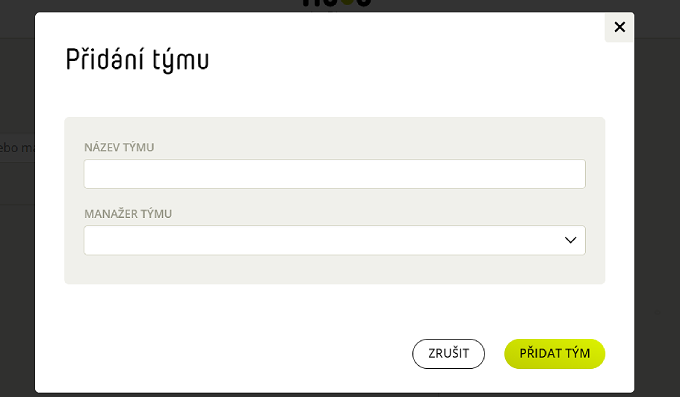
, select Add Team Members and select them from the list of users in the app.
  4. Confirm with the Add Selected button.

Team setup

SettingsTeams – click on the team you want to set up.

  1. Approval tab
    a. Select Individual Approval.

    b. Scroll and select each approver and Save Settings.
  2. Settings tab
    a. Select Individual settings for this team.
    b. Scroll to select cost centres and projects and Save.

Projects

Creating a project

  1. Section SettingsProjects.
    Manual settings
  2. Click on Add Project (top middle) .
  3. Fill in the necessary fields and select Save Project.
    Import project list
  4. Click on Import projects.
  5. Download and fill in the prepared sample file.
  6. Click Insert File, find the file on your computer and select Import.

Project approval settings

  1. Section Settings – Projects – click on the project you want to set up.
  2. Select the Approvers tab (right side of the screen).
  3. Check Individual Settings and select Single or Dual Approval.
  4. Select the approver, the approval limit and Save settings.

Modification of the project

  1. Section
    Settings – Projects
  2. Click and select
    deactivate/edit project
    .
  3. After the modification still
    Save
    .

Deleting a project

  1. Section
    Settings – Projects.
  2. Click and select
    Delete project
    .
  3. Confirm with the button
    Delete project
    .

Expenditure settings

Creating a VAT breakdown

  1. Section Settings – Expenses – VAT breakdown.
  2. Click on New VAT breakdown, add the name and abbreviation and Save.

Breakdown of VAT

Adjustment of VAT breakdown

  1. Section Settings Expenses VAT breakdown.
  2. Click on Options switch and turn the use of segmentation off/on.
  3. Click on , edit the name or abbreviation, and Save.

Deleting the VAT breakdown

  1. Section Settings Expenses VAT breakdown.
  2. Click on and select Delete VAT breakdown.
  3. Confirm with the Delete VAT breakdown button.

Creating a preconfiguration

  1. Section Settings – Expenses – Pre-accounting.

    Manual settings

  2. Click on New preconfiguration.
  3. Fill in the name, code, usage and accounts and Save.

    Importing a list of preconfigurations

  4. Click on
    Import preconfigurations.
  5. Download and fill in the prepared sample file.
  6. Click on Select File, find it on your computer and select Import.

Modifying pre-contraction

  1. Section Settings Expenses Pre-accounting.
  2. Click on Options switch and turn the use of pre-contraction off/on.
  3. Click on , edit and Save.

Export of preconfiguration

  1. Settings section –
    Expenses – Pre-booking
  2. Click , select the file format and type
    Export
    .

Deleting a preconfiguration

  1. Section Settings Expenses Pre-accounting.
  2. Click on and select Delete Preconfiguration.
  3. Confirm with the Delete preconfirmation button.

Creating a cost centre

  1. Settings Expenses Cost centres.
    Freight centres

    Manual settings:

  2. Click on New cost centre.
  3. Fill in the name and abbreviation and Save.

    Import list of resorts:

  4. Click Import resorts.
  5. Download and fill in the prepared sample file.
  6. Click Choose File, find the file on your computer and select Import.

Cost centre modification

  1. Settings Expenses Cost centres.
  2. Click on Options switch and turn the use of the cost centre off/on.
  3. Click on , edit the name or abbreviation, and Save.

Deleting a cost centre

  1. Settings Expenses Cost centres.
  2. Click on and select Delete.
  3. Confirm with the Delete Centre button.

Cost centre export

  1. Section
    Settings – Expenses – Cost centres
  2. Click on , select the file format and type
    Export
    .

Creating an accounting category

  1. Section
    Settings – Expenses – Accounting categories


    Manual settings

  2. Click on
    New accounting category.
  3. Fill in the name, code and, if necessary, attach a prefix and
    Save
    .

    Import a list of accounting categories

  4. Click on
    Import categories
    .
  5. Download and fill in the prepared sample file.
  6. Click on
    Select File
    , find it on your computer and select
    Import
    .

Adjustment of accounting category

  1. Section
    Settings – Expenses – Accounting categories
  2. Click and turn off/on the use of categories.
  3. Click , edit everything you need and
    Save.

Export accounting category

  1. Section
    Settings – Expenses – Accounting categories

  2. Click

    , select the file format and type


    Export


    .

Deleting an accounting category

  1. Section
    Settings – Expenses – Accounting categories
  2. Click on and select
    Delete
    .
  3. Confirm with the button
    Delete category.

Mandatory field settings

  1. Section Settings Expenses Required fields.
  2. Using the button Options switch button to turn off/on the obligation to fill in a specific expenditure.

Required fields

Frequently asked questions about setting expenses

In addition to studying the relevant legislation, we recommend that you consider covering the following areas in your processes and directives when implementing the digitisation of accounting documents and their archiving. All information can be found in this article.

It will appear in the cash wallet of the current team card holder. When the team card is handed over to another employee, the cash wallet is not transferred – the amount remains with the person who made the ATM withdrawal.

  • If is accented names do not appear correctly after importing, it means the file is formatted incorrectly. Sgo to to a new sample withoubor and use the Ctrl + C and Ctrl + V to copy the columns into a new file and do the import again. If problems persist, send the import file to

    info@fidoo.com


    for inspection.

Managing and changing teams

Adding members to the team

  1. Settings Teams – select the team you want to edit.
  2. Click on Settings icon and select Add Team Members.
  3. Check the users you want to add and select Add Selected.

Adding users to your team

Change manager or team name

  1. Settings Teams – select the team you want to edit.
  2. Click on Settings icon and select Edit.
  3. Edit the name or select another manager from the list of users and Save Changes.

Change team settings

Deleting a team

  1. Settings Teams – select the team you want to delete.
  2. Click on Settings icon and select Delete Team.
  3. Confirm with the Delete team button.

Setting up cession keys

Setting the meal allowance

The meal allowance rates listed in the application are set according to the Labour Code. However, you can adjust them higher as follows:

  1. Section SettingsCredits MealsCreate new (top right).
    Meal allowance rates
  2. Write the name and select the validity, add the new domestic meal allowance rates.

    You can adjust the foreign meal allowance:
    a) Bulk – enter the percentage of the meal allowance and select Recalculate.
    b) Individually – in the search window, type the country for which you want to adjust the meal allowance and change the rate for the selected country.

  3. Save.

Setting your pocket money for a trip abroad

  1. Settings Honours Pocket Money – activate Pocket Money in the system (top right).
  2. Choose to calculate your pocket money before or after the reduction of foreign diets.
  3. Enter the percentage of your pocket money and select Recalculate.
  4. Save.

Management and changes to assignments

Changes to meal allowance rates

The meal plan cannot be changed, only a new one can be created with the earliest date of validity from the day after its creation. This setting is valid until it is replaced by a new setting.

  1. Section Settings Credits- Meals Create new (top right).
  2. Write the name and select the validity, add the new domestic meal allowance rates.
    You can adjust the foreign meal allowance:
    a. Bulk – enter the percentage of the meal allowance and select Recalculate.
    b. Individually – in the search box, type the country for which you want to adjust the meal allowance. Also change the rate for the selected country.
    Meal allowance rates
  3. Save.

Changes to pocket money rates

  1. Section Settings Honours Pocket Money.
  2. Choose to calculate your pocket money before or after the reduction of foreign diets.
  3. Enter the percentage of your pocket money and select Recalculate.
  4. Save.

How approval works in Fidoo

Approval process in Fidoo

When an expense is created, a receipt is created, or a recharge card request is sent, the approver is informed of the item to approve as follows:

Expenses and receipts

  • In the web application, a number (number of items to be approved) will appear in the Approvals section.
  • In the mobile app you will informed by based on your notification settings.

Requests to top-up the employee card

  • In the web application, a number (number of items to be approved) will appear in the Approvals section.
  • The mobile app will notify you with a notification as soon as a top-up request is sent.

Who is the approver

  • An approver is an application user who approves card recharge requests, expenses and/or receipts sent to them.
  • When you become an approver, you will see a new section in the app called Team Finance. This section displays the cards, expenses and/or receipts of all users for whom you are an approver.

Hierarchy of approval

Approval at company level

  • This is the most general form of approval, where the same approver is set for all users.

Approval at team level

  • The user selected as the team manager sees the team members’ expenses and usually becomes the approver.

Approval at project level

  • For each project that is entered in theapplication, , it is specified who is its approver. When a user enters a project into an expense or assignment, the user specifies to whom it will be sent for approval.

Individual approval

  • Each user has their own approver set up, but when selecting Project Approval, the individual settings cannot be applied to approve expenses and receipts.