- Section Settings – Credits – Meals – Create new (top right).
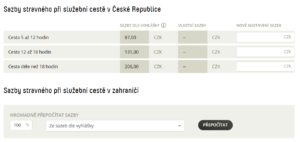
- Write the name and select the validity, add the new domestic meal allowance rates.
You can adjust the foreign meal allowance:
a) Bulk – enter the percentage of the meal allowance and select Recalculate.
b) Individually – in the search window, type the country for which you want to adjust the meal allowance and change the rate for the selected country. - Save.
Management and changes to assignments
- Section Settings – Credits- Meals – Create new (top right).
- Write the name and select the validity, add the new domestic meal allowance rates.
You can adjust the foreign meal allowance:
a. Bulk – enter the percentage of the meal allowance and select Recalculate.
b. Individually – in the search box, type the country for which you want to adjust the meal allowance. Also change the rate for the selected country. - Save.
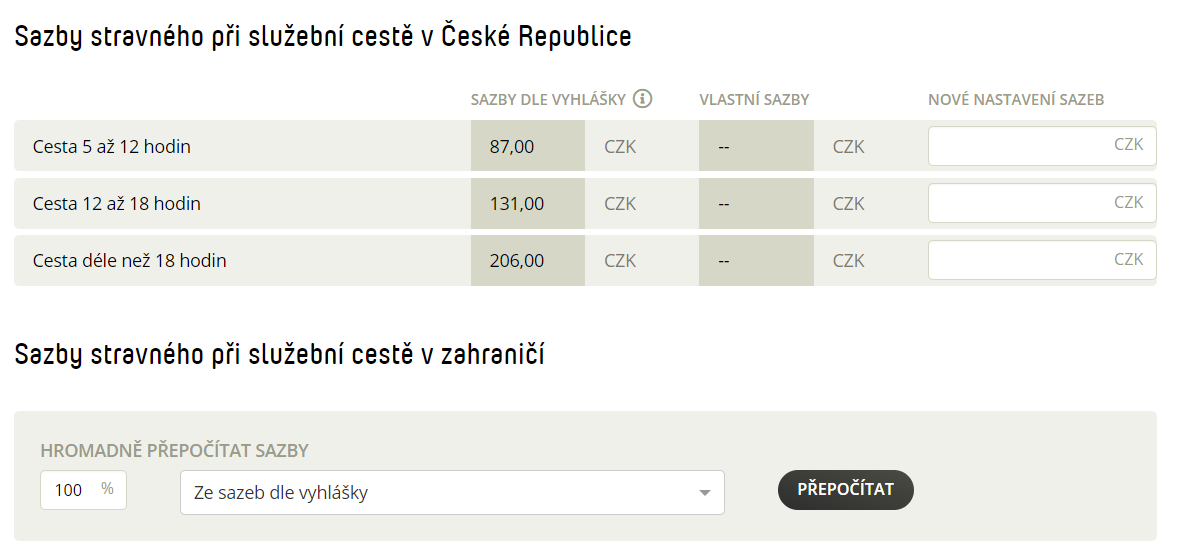
How approval works in Fidoo
Approval at company level
- This is the most general form of approval, where the same approver is set for all users.
Approval at team level
- The user selected as the team manager sees the team members’ expenses and usually becomes the approver.
Approval at project level
- For each project that is entered in theapplication, , it is specified who is its approver. When a user enters a project into an expense or assignment, the user specifies to whom it will be sent for approval.
Individual approval
- Each user has their own approver set up, but when selecting Project Approval, the individual settings cannot be applied to approve expenses and receipts.
Company settings
- Section Settings – Company – Fidoo account.
- In the Generate automatic statements box, click Change settings.
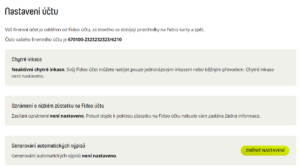
- Click on

to turn on the settings option. - Select the format, frequency and method of sending and Confirm.

- Section
Settings – Company – Billing
- Click
 to activate/deactivate sending invoices by e-mail
 - Select who will receive the invoice by email by ticking the key role, selecting a user or entering an address and Save your changes.
- Section Settings – Company – Personal billing.
- Select the frequency of personal billing and Save.
Vehicle management
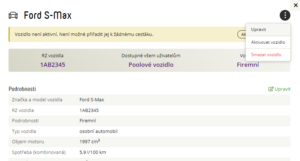
- Section Settings – Vehicles – click on the vehicle you want to activate/deactivate.
The vehicle is active: - Click on
 and select Deactivate vehicle.
The vehicle is deactivated: - Click on and select Activate vehicle.
- Section Settings – Vehicles.
- Click on the vehicle you want to delete and via select Delete vehicle.
- Confirm with the button Delete.
- Section Settings – Vehicles .
- Set the filter and click on

- ChooseFormat and click on Export.
Approval and rejection of expenditure
- Bottom menu – Approvals – Expenditure tab.
- Click on the expense you want to approve.
- If necessary, select Edit, edit the data and Save.
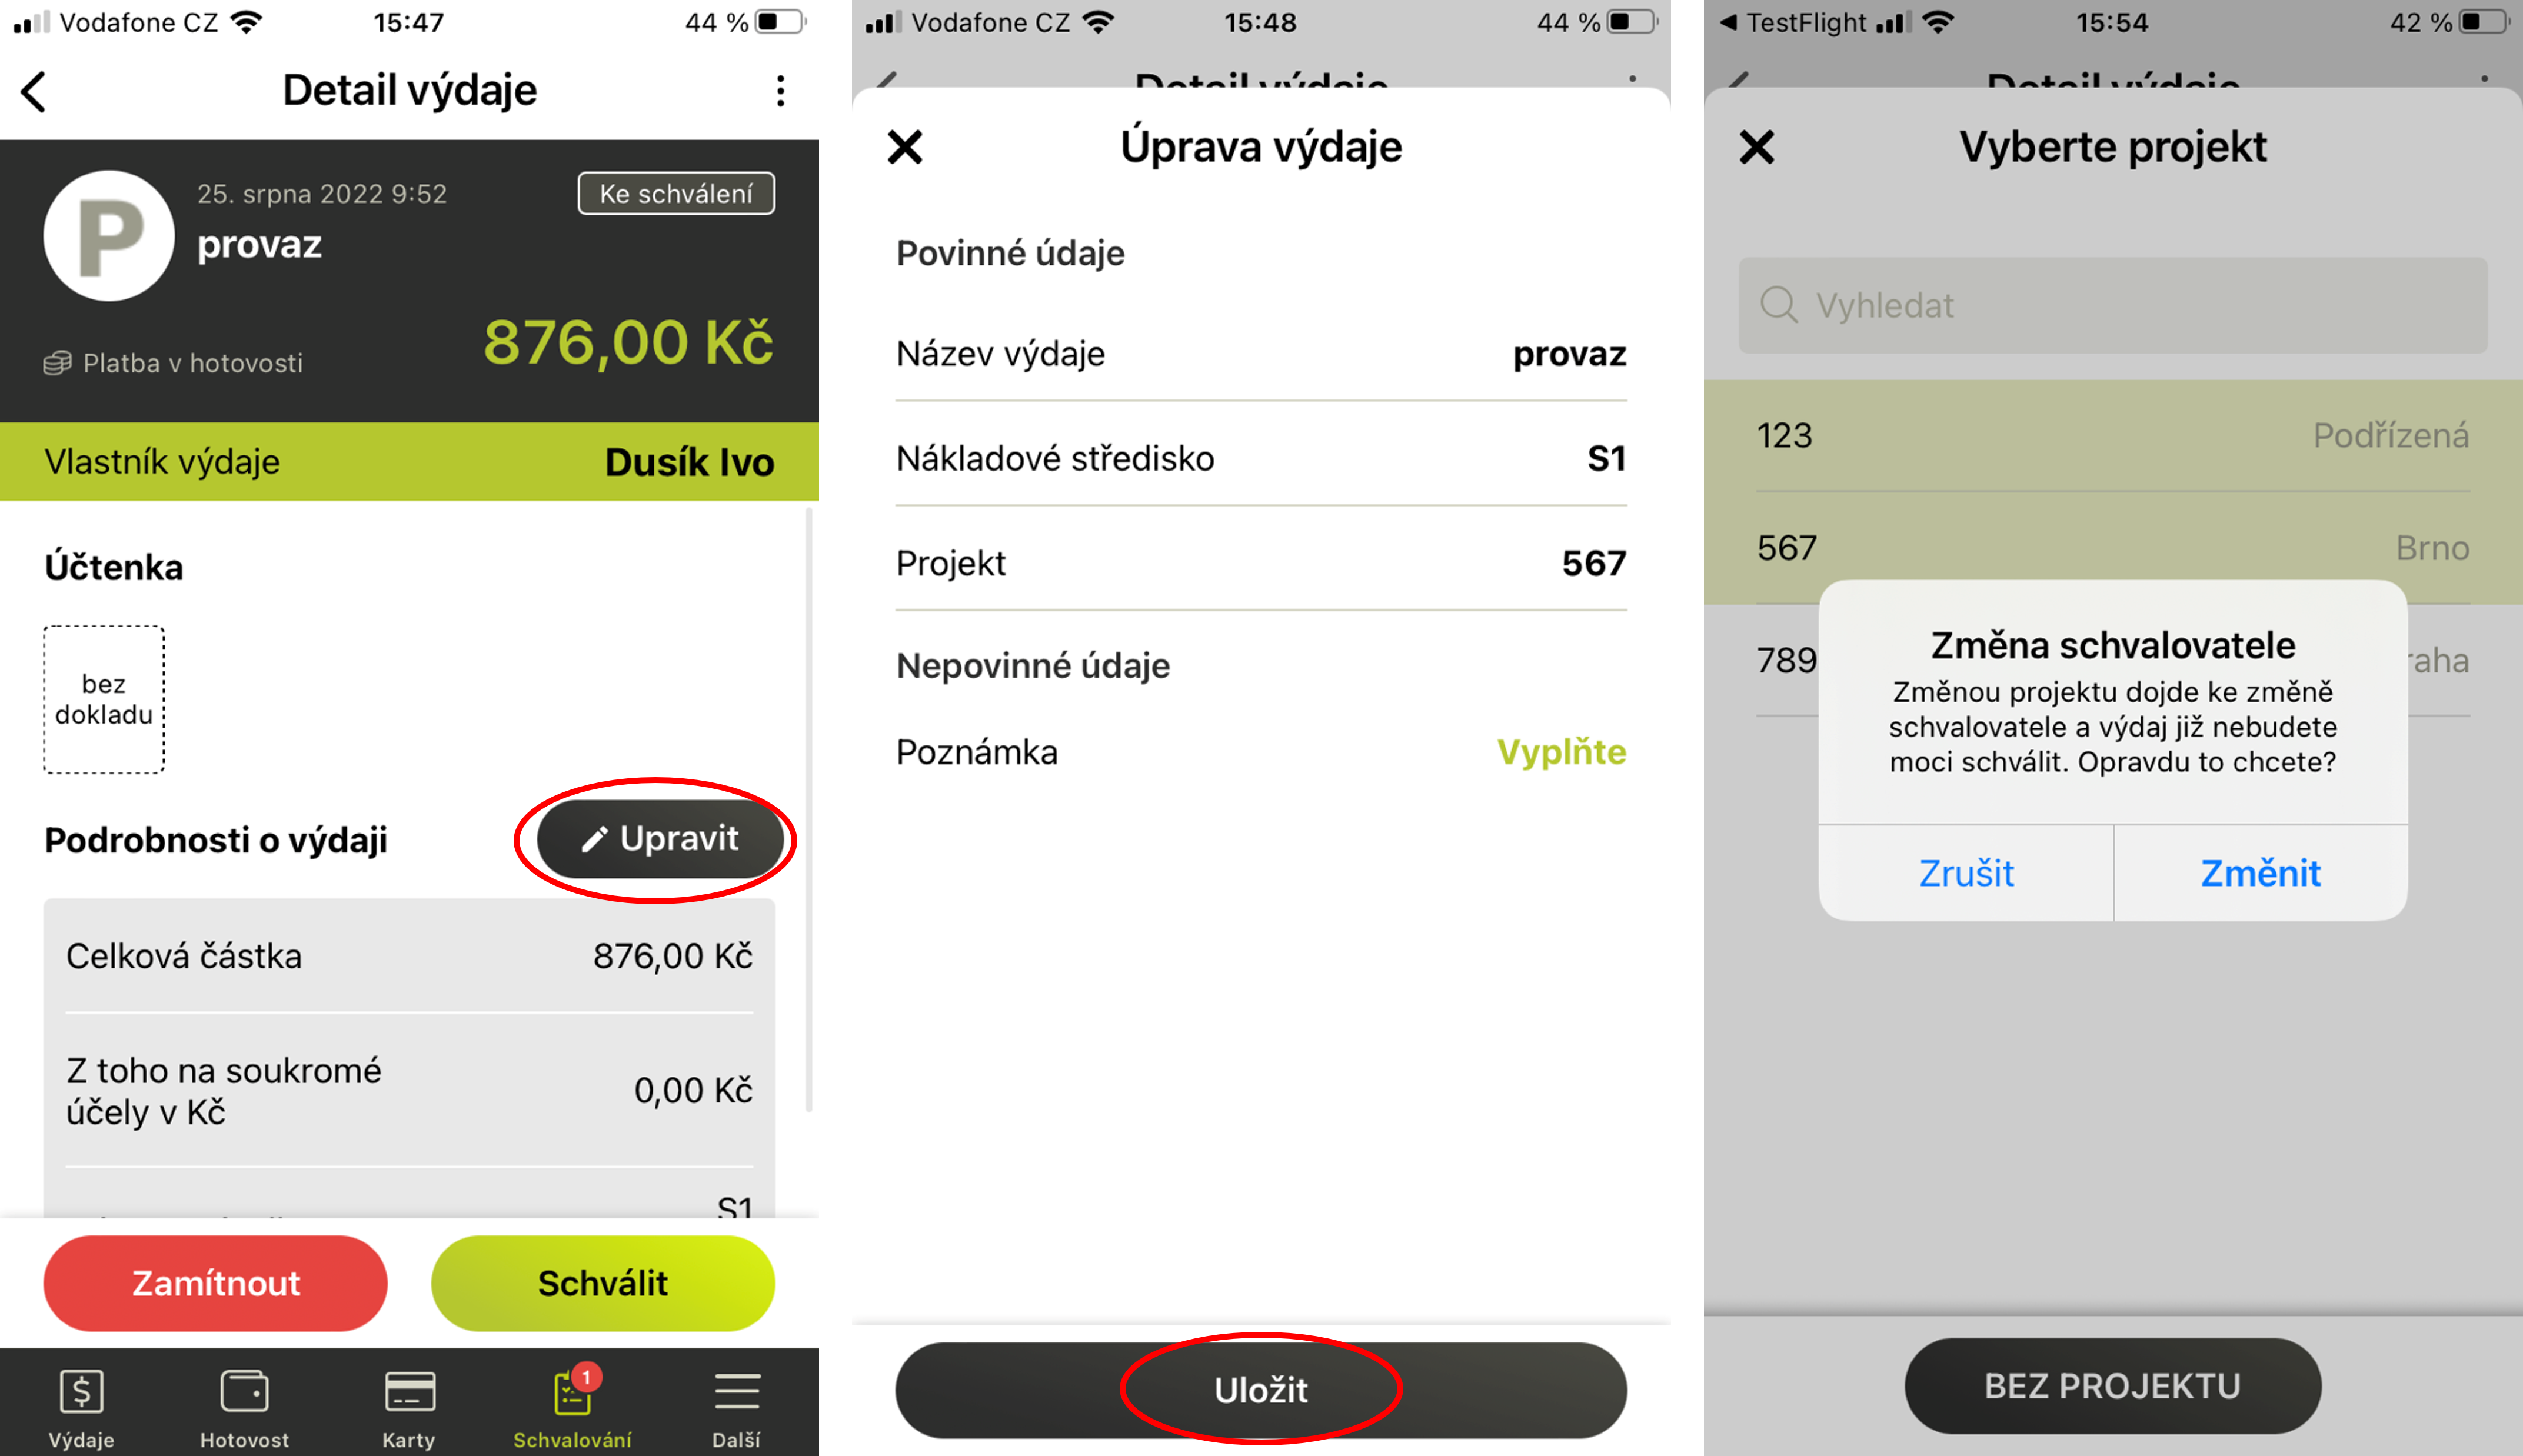
- Select Approve and Confirm.
Personal settlement
- Section Accounting agenda – Personal accounts – select the user.
- Check the expenses that are to be private (box to the right of the expense).
- Click on
 (bottom right) and select Close Expenses as Private.
 - Confirm by clicking Close as private.
- Section Accounting agenda – Personal accounts – select the user.
- Tick the items you want to move (box to the right of the expense).
- Click on (bottom right) and select Move to next period.
- Section Accounting agenda – Personal accounts – select the user.
- Scroll all the way down or click the Moved to next period tab.
- Select View and click
 to return the expense to the current accounting period.

- Section Accounting agenda – Personal accounts – select the user.
- Find the item you want to reopen and click .
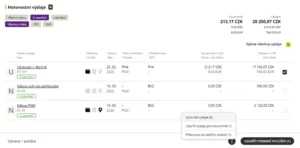
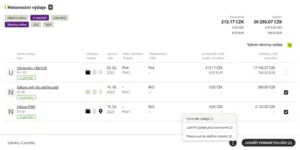
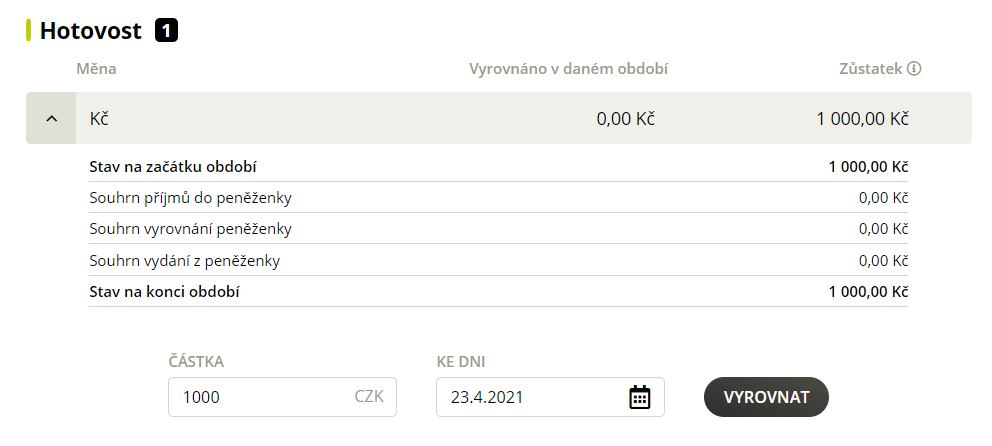
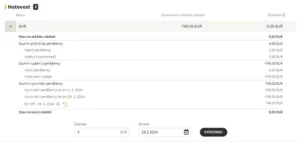
- Section Accounting agenda – Personal accounts – select the user.
- Scroll down or click on the Cash tab.
- Enter the date and select Align All.
or click on ![]() , enter the amount and date and select Settle.
, enter the amount and date and select Settle.
- Section Accounting agenda – Personal accounts – select the user.
- Scroll down or click on the Cash expenditures tab.
- Tick the expenses to be offset (box to the right of the expense).
- Click on
(bottom right) and select Balance expenses.
- Confirm with the Align button.

The balanced expenditure can be found in the Wallet Settlement Summary. Here you also have the option to undo the expense settlement by clicking on . It is possible to return the expenses individually – each balanced expense is listed here on a separate line.
Click on Reconcile to reconcile the expenditure in the amount on the date specified.
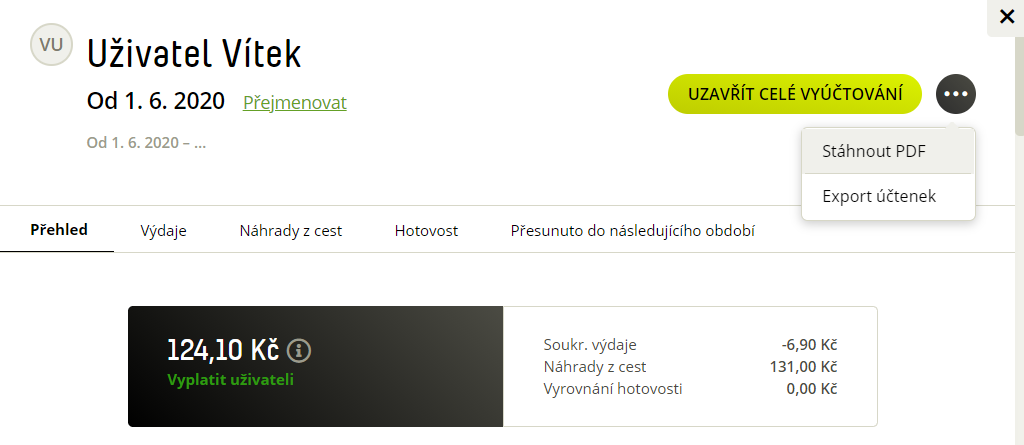
- Section Accounting agenda – Personal accounts – select the user.
- Check that all items are in the Closed state.
- Select Close entire settlement (top right) and confirm with the Close settlement button.

- Section Accounting agenda – Personal accounts – select the Personal accounts you want to export.
- Click on (top right) and select Download PDF.
- Section Accounting agenda – Personal accounts – select the Personal accounts you want to export.
- Click on (top right) and select Export receipts.
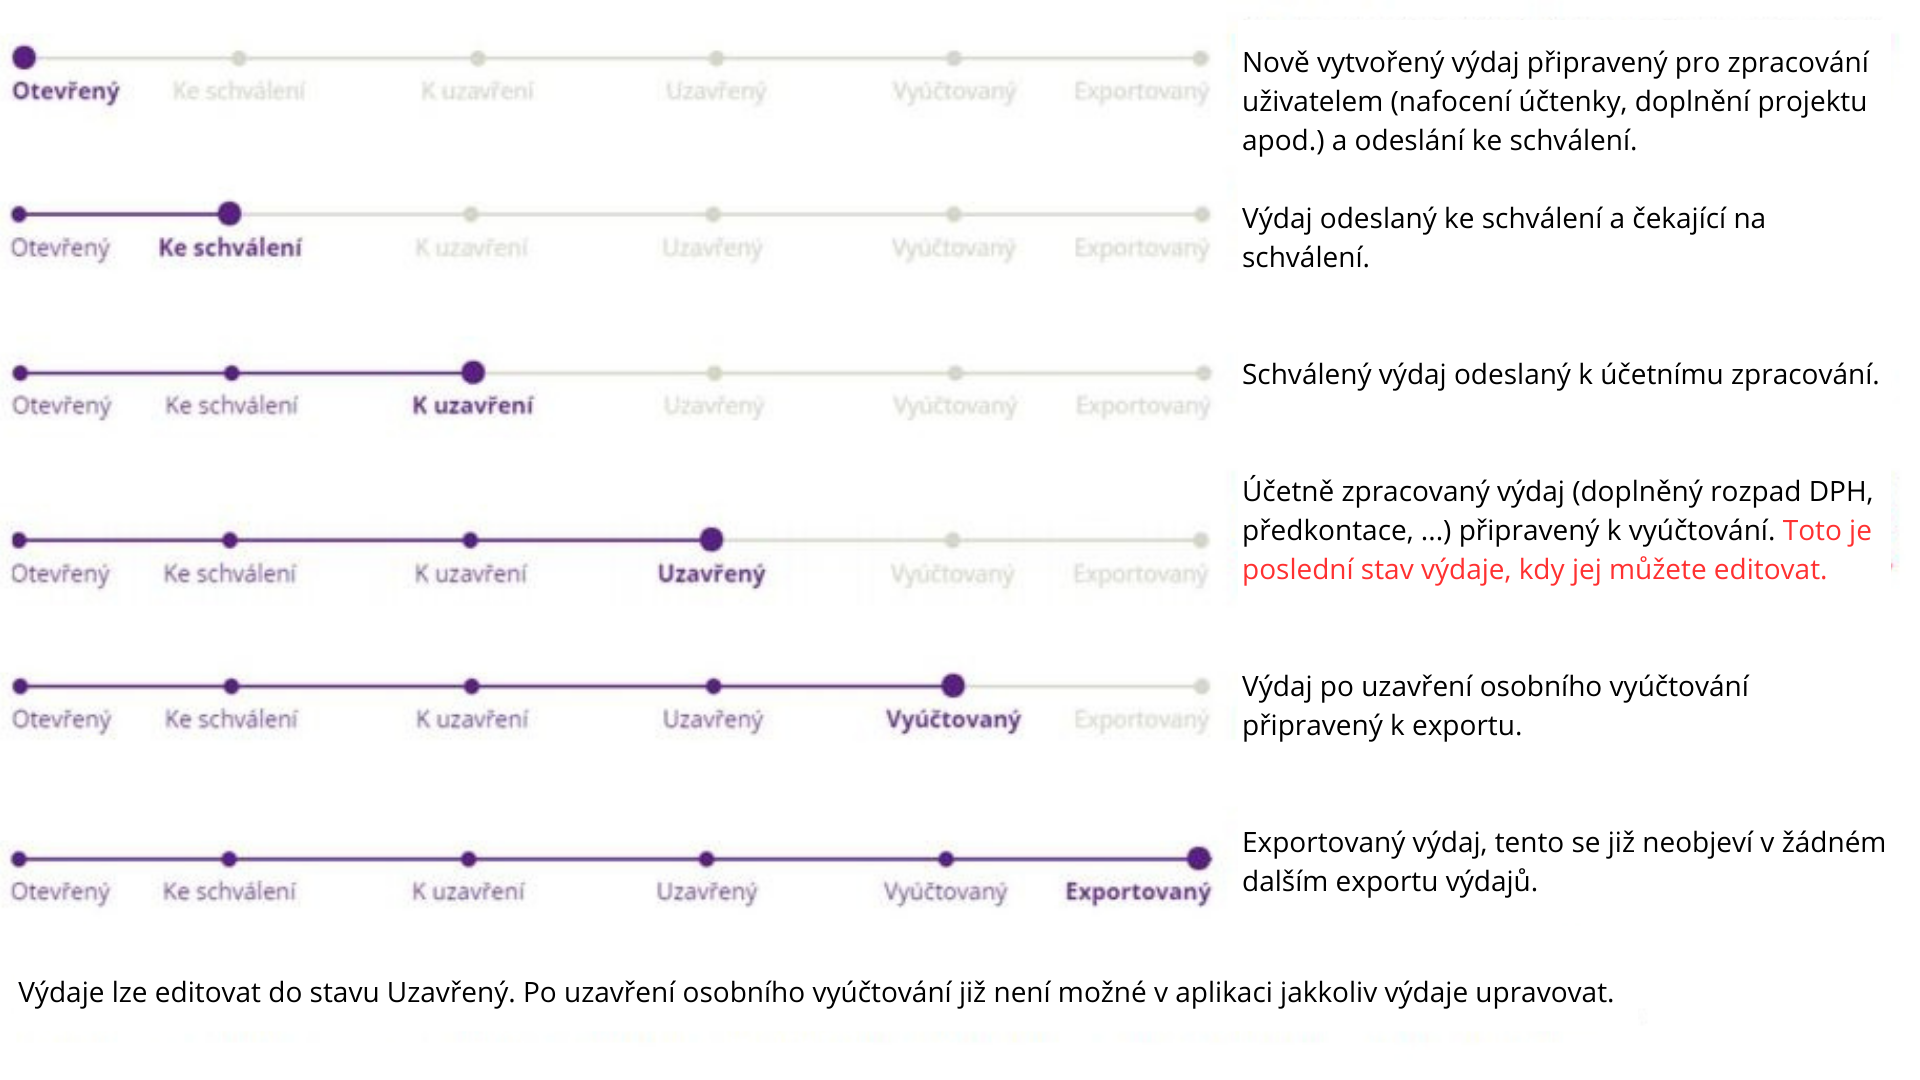
Description of individual expenditure balances:
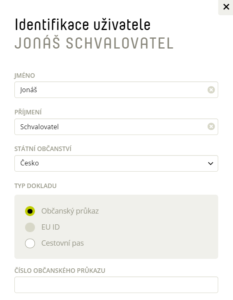
Correct identity verification
- Settings – People – click on the user you want to identify.
- Click on and select Make Identification.
or - Click Make Identification in the orange bar on the right side of the screen.
- Fill in the required data and Save settings.
- Settings – People – select the user you want to change.
- Click on and select Edit Identification.
- Enter the new data and Save settings.
Project management and changes
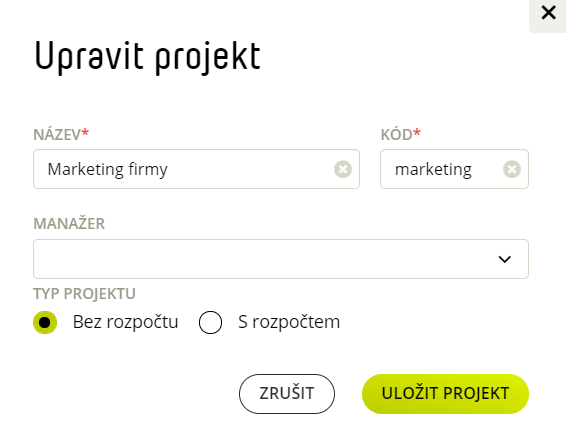
- Section Settings – Projects – select the project you want to edit.
- Click on
and select Edit Project.
- Edit the necessary data and Save the project.
- Section Settings – Projects – select the project you want to edit.
- Click on
and type Activate/deactivate project.
- Settings – Projects – click on the project you want to delete.
- Click on
and select Delete Project.