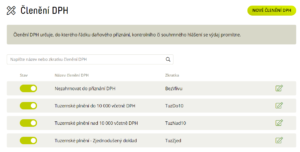
Creating a VAT breakdown
Adjustment of VAT breakdown
Deleting the VAT breakdown
Creating a preconfiguration
- Section Settings – Expenses – Pre-accounting.
Manual settings
- Click on New preconfiguration.
- Fill in the name, code, usage and accounts and Save.
Importing a list of preconfigurations
- Click on
Import preconfigurations.
- Download and fill in the prepared sample file.
- Click on Select File, find it on your computer and select Import.
The abbreviation of the pre-contraction must be exactly the same as the abbreviation of that pre-contraction in the accounts (including hooks and commas).
The MD/D code and accounts must be unique. If they are the same, the line will be overwritten by the last preconfiguration with the same code (the previous ones will not be imported).
Modifying pre-contraction
You can bulk edit the state of preconfigurations (active/inactive) by changing the "state" column in the import file and then importing again
Export of preconfiguration
- Settings section –
Expenses – Pre-booking
- Click
 , select the file format and type
Export
.
Deleting a preconfiguration
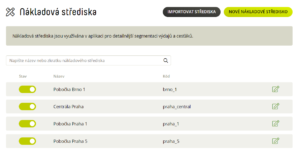
Creating a cost centre
The resort code must be unique. If the codes are the same, the line will be overwritten by the last centre with the same code (the previous ones will not be imported).
Cost centre modification
You can bulk edit the status of cost centres (active/inactive) by changing the "state" column in the import file and then importing again.
Deleting a cost centre
Cost centre export
- Section
Settings – Expenses – Cost centres
- Click on
 , select the file format and type
Export
.
Creating an accounting category
- Section
Settings – Expenses – Accounting categories
Manual settings - Click on
New accounting category.
- Fill in the name, code and, if necessary, attach a prefix and
Save
.Import a list of accounting categories
- Click on
Import categories
. - Download and fill in the prepared sample file.
- Click on
Select File
, find it on your computer and select
Import
.
Adjustment of accounting category
- Section
Settings – Expenses – Accounting categories
- Click
 and turn off/on the use of categories.
 - Click
 , edit everything you need and
Save.
Export accounting category
- Section
Settings – Expenses – Accounting categories
Click
, select the file format and type
Export
.
Deleting an accounting category
- Section
Settings – Expenses – Accounting categories
- Click on and select
Delete
. - Confirm with the button
Delete category.
When you decide to break down an expense into items, the specific abbreviation of the cost centre, pre-costing, project or VAT will not appear in the list of expenses in the personal statement, but a number in brackets, e.g. (2) which informs about the number of decayed items for which this data is entered.
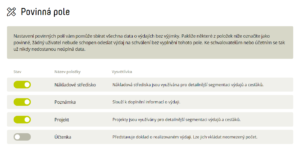
Mandatory field settings
If the user does not fill in the required fields, the application will not allow them to send the expense for further processing (approval or accounting closure).
Frequently asked questions about setting expenses
In addition to studying the relevant legislation, we recommend that you consider covering the following areas in your processes and directives when implementing the digitisation of accounting documents and their archiving. All information can be found in this article.
It will appear in the cash wallet of the current team card holder. When the team card is handed over to another employee, the cash wallet is not transferred – the amount remains with the person who made the ATM withdrawal.
- If is accented names do not appear correctly after importing, it means the file is formatted incorrectly. Sgo to to a new sample withoubor and use the Ctrl + C and Ctrl + V to copy the columns into a new file and do the import again. If problems persist, send the import file to
info@fidoo.com
for inspection.


